


Whether you have just moved in or have lived in your current place for years, there are always ways you can improve your house with a few house projects (DIY or hire a contractor). The big question is which home improvement ideas are worth it.
To me, these are the projects that have dramatic impacts. They add beauty, increase organization and maximize effective square footage without breaking the bank. It’s the projects that are not going to involve heavy plumbing or structural changes, which are what adds astronomical cost. Most of these projects you can do in almost any house or apartment.
Here is my favorite list of home improvement ideas that add function or aesthetics, are simple yet impactful and most importantly you will 100% love for years to come.
Switch a Cabinet to Floating Shelves to Increase Light
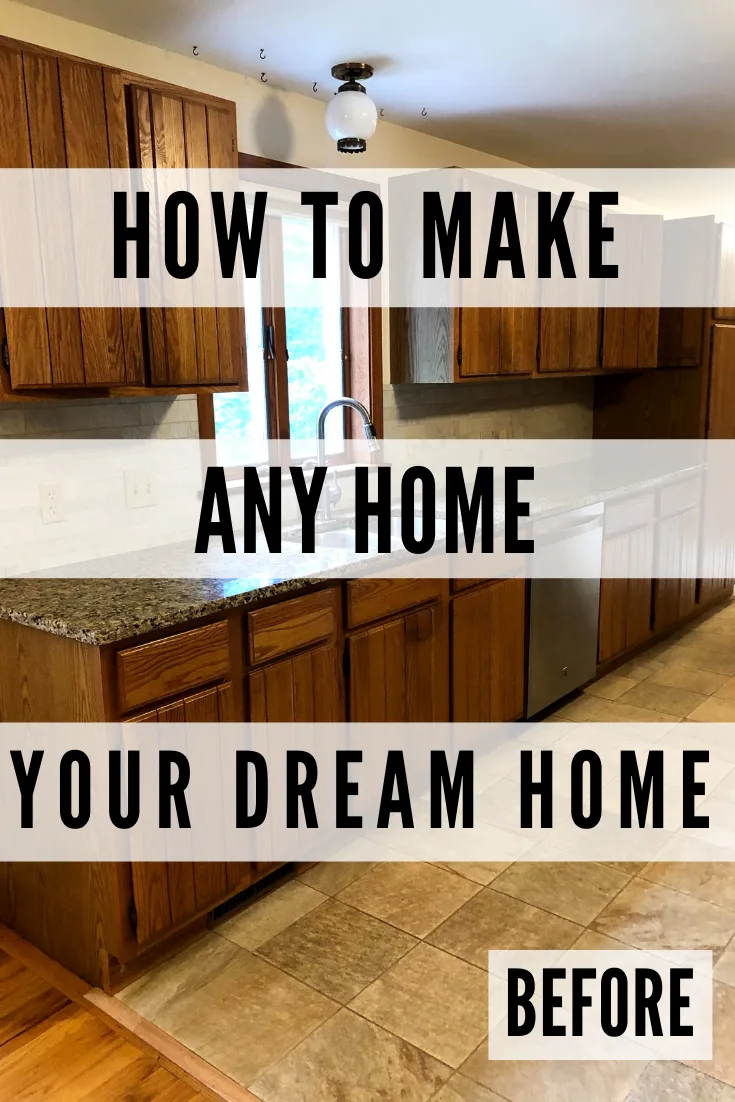
I am a huge fan of switching out a single cabinet for open shelving next to the kitchen window. This will give you a more modern look. It will also and most importantly give you so much more natural light in your kitchen. We had a cabinet that was blocking the view and the light pouring into that window. It also softens the transition into your kitchen by making it more open concept.
I am not a fan of all open cabinets because I could never keep the items on the shelves neat and pretty. Additionally, our kitchen isn’t big enough to remove all upper cabinets and still have storage.
Adding Windows to a Wall
Hear me out! This project is worth the cost and is by far one of my favorite home improvement ideas!
I cannot say enough about how impactful and wonderful windows can be. While putting in new windows on a wall that didn’t have them before will probably cost $1000-$5000, it is completely worth it if you can swing it. Windows add light and timeless beauty to a room. If you start to look at pictures of beautiful houses and spaces, they have lots of natural light and windows for a reason.
It took us living in an apartment where there were almost no windows for me to really see the value.
In our current living room, we added two windows on either side of our fireplace. The room went from very dreary and sad to one of our favorite rooms to sit in. Windows add the illusion of a bigger space. It was by far the best house project we have done.
My biggest tip here would be to get quotes from multiple contractors. We had quotes that ranged from 3K to almost 15K for adding two windows.


Buy a New Front Door that Can Act as a Window
Another option if you aren’t ready to take on hiring someone to add windows is to change out your front door for one that lets a lot of light in. It is essentially an extra window and can add so much beauty to your entry way and curbside appeal. We made sure the glass was not clear but had a pattern to it, so we had privacy.
Most hardware stores have the option for installation too so this is a much easier project than adding windows, where you will have to hire a contractor.
Paint with High Light Reflectance Value (LRV)
Another way to add light and modernize your home is to change the paint out. Color will either absorb light or reflect it. You want to reflect it. White reflects 100% of color while black absorbs 100% of color. An easy way to know is by looking up a paint color’s LRV. Just type the brand name color and LRV and it should come up.
When you see before and after pictures of room makeovers, one of the easiest ways to make a dramatic difference is paint. While the color is important and should be something you like, LRV is just as important.
A good rule of thumb is to stay above 75. We painted most of the rooms in our house with pale oak (LRV). There are a lot of trees around our house, so we wanted to maximize the amount of light coming in. Therefore, we picked very light color for our walls.
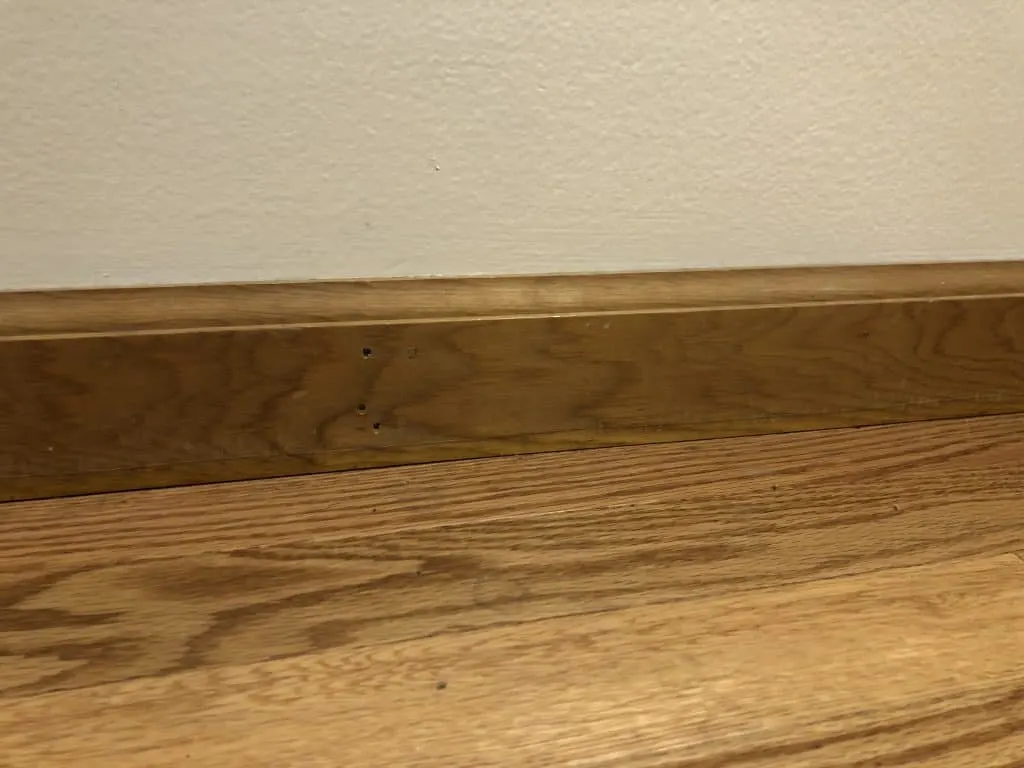
Paint Oak Trim White
We also painted our oak trim white (and our window trim and our oak doors). I considered sanding and staining for a lighter more modern color oak. The light oak would have reflected lighter than the very dark orange strain that the previous owners had picked. After reading tutorials and trying to re-stain a scrap section of wood, I realized it was way more work and a lot harder than painting.
Like I said, I love wood trim when it is done correctly. If you have a light color wood, then work with it to modernize the paint colors on your walls. However, our house had too much dark oak. The flooring, trim, windows, and doors were all a dark orange oak. Once we painted them, the difference was so dramatic since there were so many surfaces light could bounce off now, whereas before all that dark wood absorbed light. I highly recommend it and wrote a tutorial on painting oak trim white since I learned so much in the process. Paint is very inexpensive and can make a gigantic difference.


Re-Paint Ceilings White
It never occurred to me to paint our ceilings. They were white and seemed fine. It wasn’t until we painted our kitchen cabinets white that I realized, our ceilings weren’t white. They were a pink white. The undertone in them wasn’t something I saw right away.
When we did finally paint the ceiling white (buy paint ceiling paint, don’t use any paint), it really tied all of our other projects together since we weren’t getting unwanted undertones from the ceiling on the walls. If you want to know what undertones or how “white” your ceiling is, simply grab a bunch of white swatches from the hardware store and compare them to your ceiling. When you compare whites, you will get to see the differences. See pictures below.
New Hardware is Within the Budget
Buying new hardware can be purchased in bulk for so much less. We updated the handles and hinges on our doors and hardware and hinges on the kitchen cabinets. Originally, we went to Home Depot and priced these options out. They were so expensive that we didn’t do the project at first. Instead I went down the rabbit hole of DIY ideas to update hardware. Learn from me! Do not spray-paint hardware, it will not last and scratch off. They will look even worse if you go that route.
Anyway, I mentioned this whole story to a friend of mine who had recently updated her kitchen and she told me that hardware is a fraction of the price on amazon because you can buy them in bulk. She was 100% right. I never would have looked there so I am telling you to save money and grab these online!
Where we bought our hardware changed the project from not in our budget to in our budget.
Lighting in Upstairs Bedrooms
A lot of older homes like ours do not have ceiling lighting. Instead, there is usually a plug on the outlet for a lamp. Since my husband is very handy when it comes to electrical, we added ceiling fans to every room. The ability to have a ceiling fan gives the room such a nice, polished look. It also adds valuable space since you don’t need to add lamps.
In the summer, running the ceiling fans really helps keep the upstairs cool. This project really increased our quality of life a lot.
If you are very handy with electrical, then you can check out our DIY ceiling fan post here. If you are not, this is a very affordable project even if you need to hire an electrician. You can still do a lot of the prep work if you follow our DIY post and then have the electrician hook everything up at the very end. They will simply run a cord from the center of your ceiling to the switch.
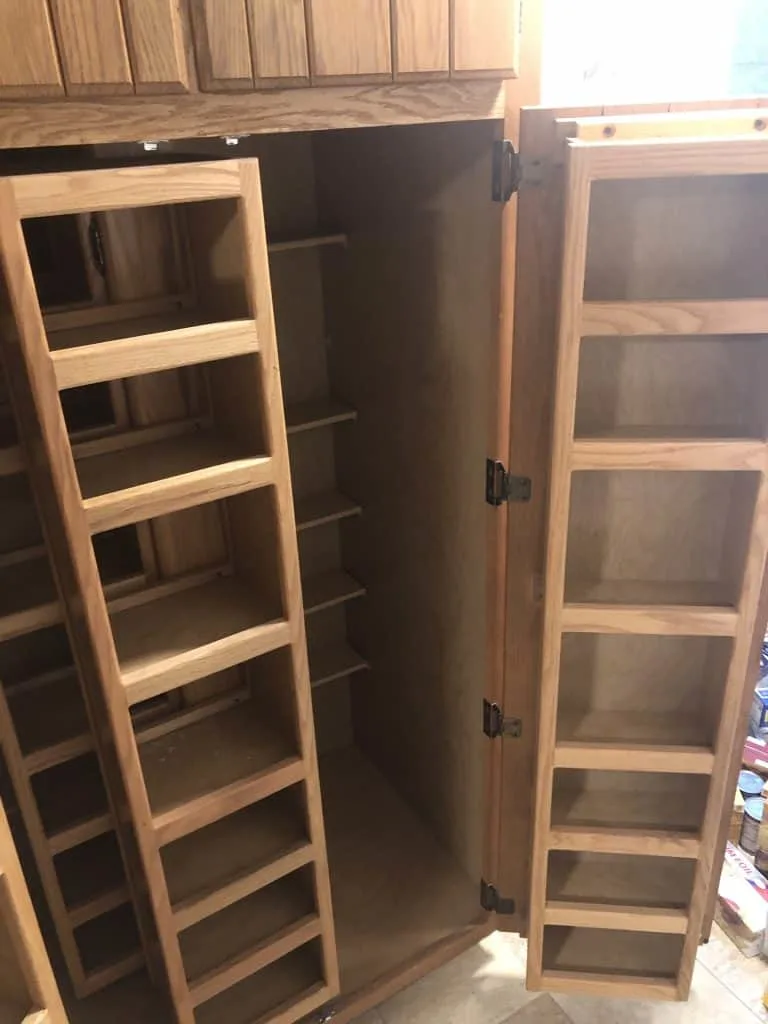
Pull Out Shelving in the Kitchen
Since our kitchen is small, this doubled our effective storage. We added two pull out shelves to every single bottom cabinet. We also added pull out shelves to our pantry. It is so much easier to be able to use the whole space of a deep shelf (like a bottom cabinet) when you can pull the shelf out. Additionally, instead of having to bend down to put away items on the bottom cabinet shelf, you can reach down while standing and pull the shelf out to put items away. Such a time saver!
First, we bought pull out shelves. After we did all the base cabinets, we made our own DIY pull out pantry shelves.
This is a must for anyone who wants better organization and more effective space in a kitchen (or has a smaller kitchen like me!). Honestly, even if we had a bigger kitchen, I would still do this project.


Adding Board and Batten
As far as projects go, this one is a super easy project. All you really need is some paint, caulk, a level, boards, hammer and nails (or a nail gun).
We did this on the wall next to our garage door and it takes a plain wall and gives it so much character. It also gives you so much room to hang all of the crap that comes in. The snowsuits, jackets, swimsuits, towels, backpacks, jackets and hats all live on that wall.
If you don’t have a mudroom, then this is your mudroom hack! You can also put a bench in front for shoes to be stored below. I have also seen some benches with baskets or bins for housing all of the gloves, hats and accessories.
Another place I would consider adding board and batten is the dinning room. There are so many different styles, it can be a great way to have an accent wall.
Splurge on New Blinds
Something that can make your house look so outdated are what is covering your windows. We bought white blinds for every window, and they add so much to the look and feel of each room. Additionally, they keep the heat in and the cold out in the winter.
Before I bought my blinds, I got an awesome tip from a friend. She said her biggest mistake when picking out window blinds was matching the wall color. If you have white window trim, then go with white blinds. If you have wood window trims, then pick a color that goes with the wood color. Do not base your color choice on the wall color since you might want to update your wall color in the future and won’t want to buy new blinds.
Buy Large Mirrors as Decor
Another easy way to make a space feel bigger and increase the natural light is mirrors. We have added mirrors on walls that get great light so that the mirror can act as a window. Another way we use mirror décor is in spaces where there are no windows, and a window can not be added. For us, our upstairs hallway has no windows and no outside walls. We added fun circle mirrors to the wall, and it helped bounce the light around.
Mirrors can be a great option if adding a window is out of budget.
Update Outlets and Light Switches
Old outlets and switches can date a space very easily. Our old ones were such an eye sore so this project was a must in our house.
Please do not paint your outlets and switches when you paint the walls! I promise you that switching out light switches and outlets the correct way is not hard at all. If you are nervous about anything electrical, then watch as many YouTube videos about how to do this until you feel comfortable (or hire an electrician).
Buy New Light Bulbs
Updating light bulbs for anything more than energy efficiency would have never occurred to me as a house improvement project. It is one of those projects that is very worth it though since it can change the tone and color of any space simply by picking a better light bulb.
The most important thing to know about a light bulb is the temperature. This is because the temperature of a light bulb tells you how warm or cool the light will be. If you want a vintage look to your room, then you will want a low temperature (2,000K-2,500K). The light will add a lot of warmth with an orange and yellow glow. As you increase in temperature, the light becomes whiter and at very high temperatures, light has a blue color to it.
For most living spaces, you want to be between 3,600K to 5,000K. It is most like daylight. Our house was built 35 years ago and we switched out almost every light bulb. The immediate brightness it gave was incredible.
Add Shelving to Make Better Use of Vertical Space
Adding shelving where you can make use of vertical space is always a great home improvement project. My favorite places to add shelving are upstairs bedroom closets, coat closets, and garages.
We bought these closet organizer systems online and outfitted both of our kid’s closets with them. It was amazing because it eliminated the need for dressers freeing up so much more space in their bedrooms. They were super easy to install.
The better your organizational systems are, the more you can put away leaving you with more living space. If you really want to up your organization, then check out my favorite basket tricks for easy cleaning and simple organization.
Maximize Small Space for Kitchen Table
Any home improvement project that improves the flow of your house can make a big difference. For us and for a lot of houses, the space for the kitchen table is small. We are a family of four and adding a table and four chairs in that space is unrealistic.
Therefore, I spent hours trying to find creative solutions. My two favorites are adding banquette seating or doing a breakfast bar. If you have two empty walls in the space, bench seating would free up so much space and look so beautiful. We have a large narrow hall with two large windows so banquette seating won’t help us much. Instead, we are going to add a bar along the wall with the windows. I very much look forward to the space this will free up and to drinking coffee in the morning while looking out over the backyard. I will add a picture once we finish this project that we are starting this month!!
Fixing a Badly Placed Bathroom
In terms of house improvement projects, it is probably not worth it to move a bathroom due to plumbing costs. This can be frustrating if you have a bathroom like ours. The door opens directly into the living room. Therefore, if you are sitting in the living room and the bathroom door is open, then it feels as if the toilet is in the living room.
One very clever solution is to give the illusion of more privacy by changing where the door to the bathroom is or by building out a wall to make a “hallway” to the bathroom. While this can be very hard to explain, hopefully the schematic below along with the example of what we did will help.
So to fix this, we made our bathroom twice as big so that we could change the door. We used the extra space in the bathroom for a small cleaning closet. We were also able to add a little closet on the new wall for extra storage. While the bathroom is still in the same spot, you cannot see the toilet from the living room anymore. It feels like the bathroom is farther away just because the door is on a different wall.
You would likely still need a contractor to help you with this project depending on how handy you are.
Countertop over Laundry with Shelving
When we moved in, our laundry area was just two machines in a closet. My favorite laundry room or laundry closet improvements are adding a counter over the top and shelving above the counter. We did one upper cabinet with two open shelves.
Outfitting your laundry area with a counter and some shelves can go long way in increasing storage and functional space. You don’t need a lot of space either, you can totally add a counter and shelving above the laundry even if your laundry is in a closet.
All you need to do is get some plywood cut to size (ask the store to cut it while you are there), stain it, and brace it above your laundry with brackets in the walls. No matter what don’t permanently install it since you might need to access behind the laundry machines. Instead let it sit on brackets. If you want something more than stained wood as a counter, then you could order a laminate counter for your laundry.
We also bought a kitchen upper cabinet and screwed it into the wall above the laundry to house all of the cleaning supplies and laundry detergent. Next to that we did two shelves of wood to hold all of the laundry baskets. This way the counter can be used for folding!
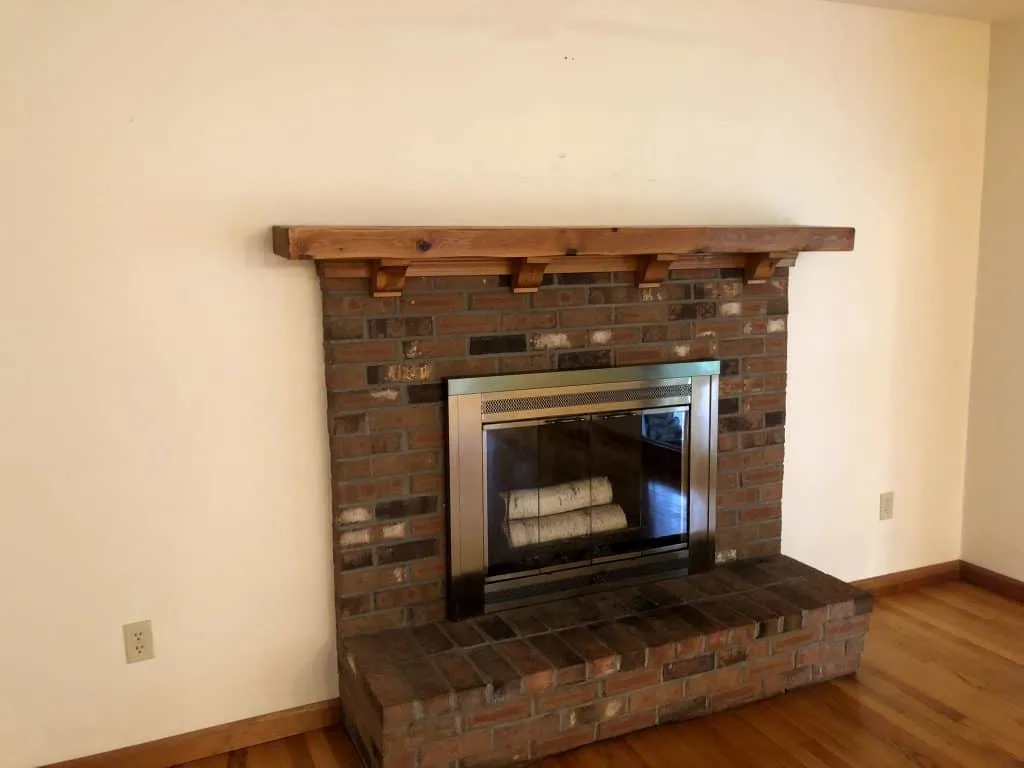
Don’t Be Afraid to Paint the Fireplace
By now, you probably realize paint is one of the best tools you can utilize in home improvement projects. Another painting project we did in our house was to paint our brick fireplace white.
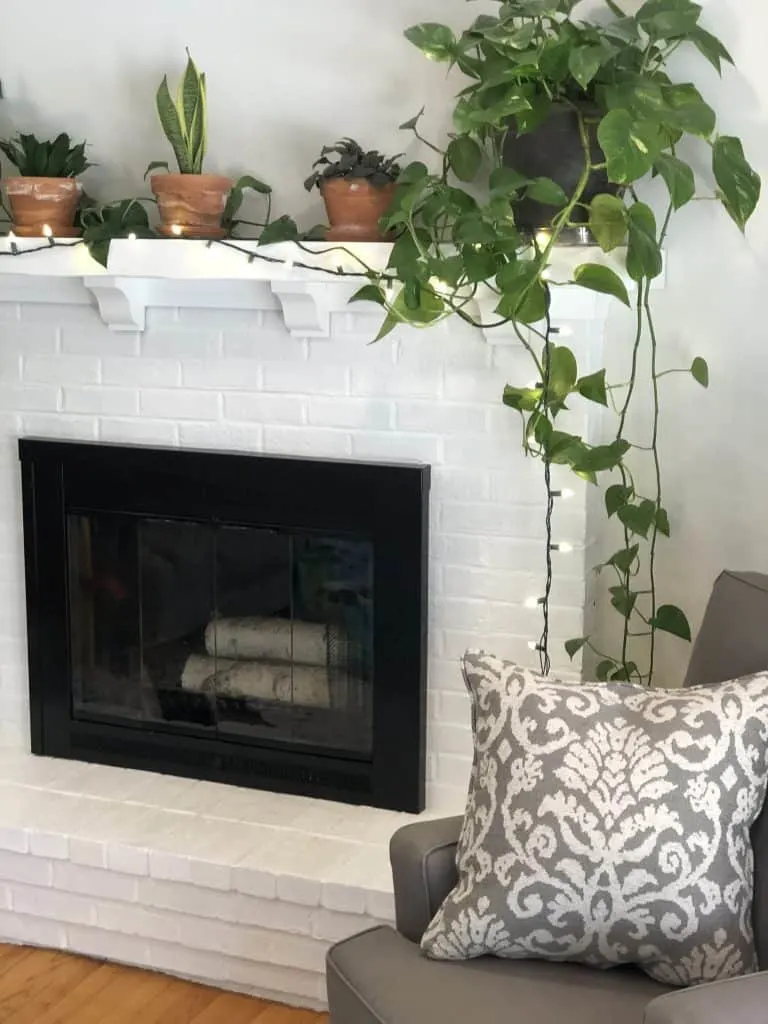
I was very afraid of this because unlike walls, I was very positive I couldn’t undo it if it turned out terrible. Eventually I went for it because I couldn’t stand the brick on our fireplace. It was an orange red with random black and white bricks scattered through it.
The only important part is you use paint for brick. It is like a gel. You don’t need to prime before or anything just use paint for brick. I did white because I love the look of white brick. After we finished, we spray painted the fire place doors with black spray paint. Make sure if you do this, you buy the one for spray painting doors because that can withstand very hot temperatures.
You can also do what is called a white wash. It is hard to explain what this looks like but there are plenty of DIY white wash fireplaces online to look at.


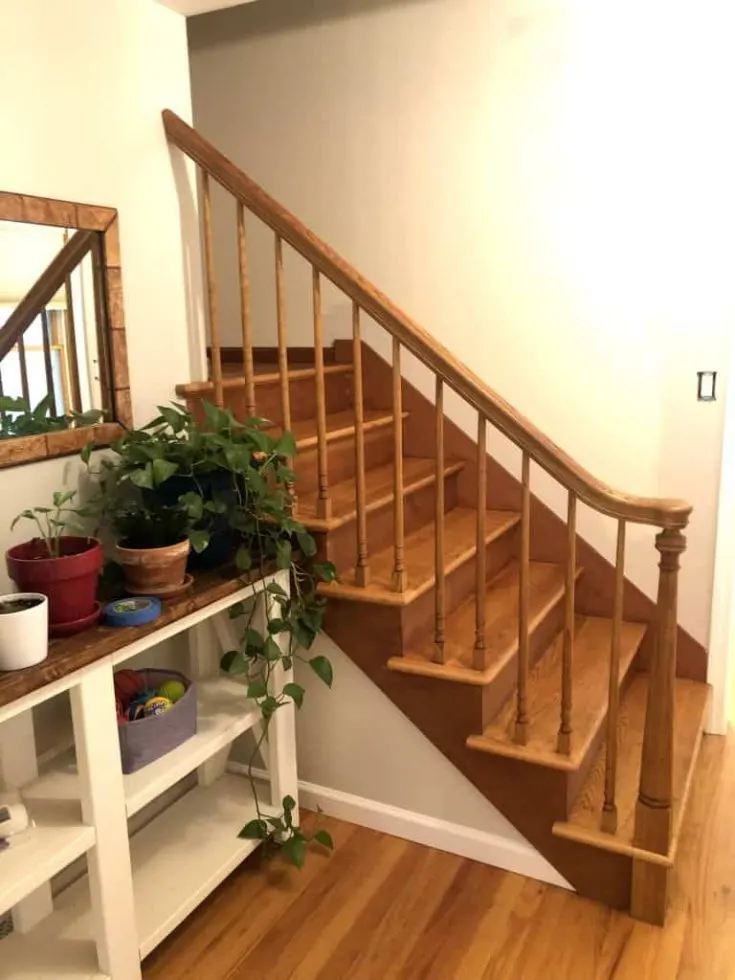
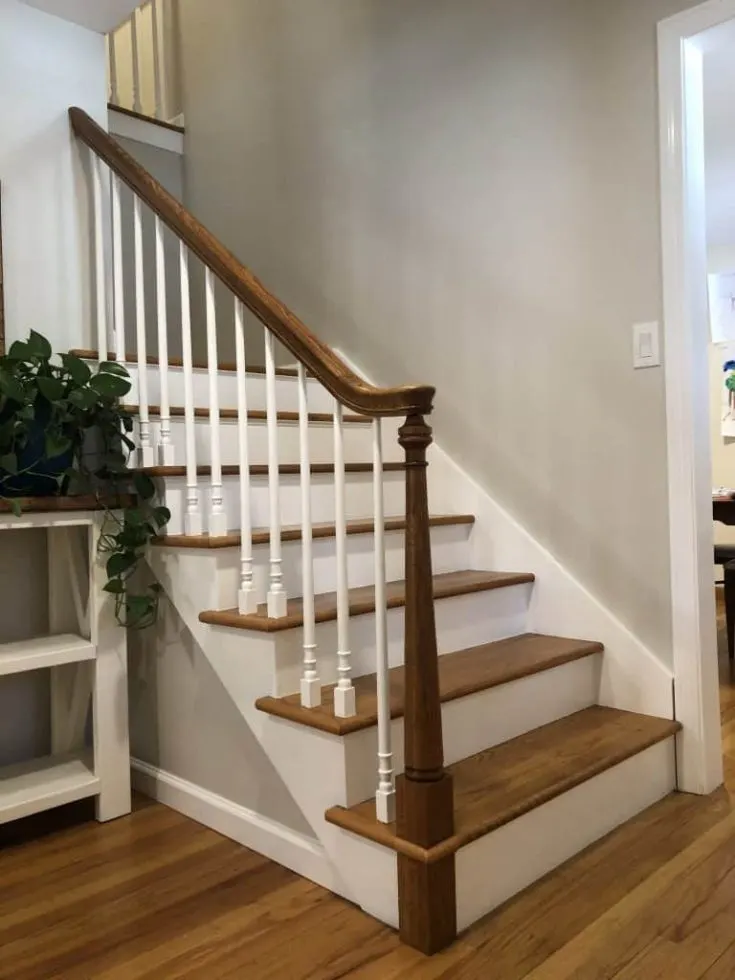
Paint Stairs
We also eventually took on the project of painting our stairs. We painted the railings and also the vertical parts of the steps. I do not recommend ever painting the part of the stairs where you step. The paint will chip!
While I love wood stairs, our staircase was not in great condition. To give it some much needed attention, I filled all the cracks and holes and then painted. I love the combination of white and wood on a staircase. The white really lets the wood sections take the spot light.
The only advice I would give to you is to know that painting railing and stairs take a lot of patience and a good amount of time. It was still totally worth it for me but I just needed to plan tackling that project when I knew I had the time to dedicate to it. After I finished our stairs, I wrote a how to paint stairs post so you can learn from my experience.


Tear out Carpets
Something we always do when we move is to tear out old carpet. You never know what is growing in the carpet, which is why carpets are a big source of allergies. I prefer hardwood flooring. They are easier to clean, and you can always throw a rug down.
So while I love the look of hardwood floors, I do not love the price of hardwood floors. Additionally, installing them yourself is very hard to do. What is much easier to install and costs a lot less are the new engineered flooring. We use the LifeProof brand. It was very easy to install. The absolute best part is that it holds up better than hardwood. It is scratch proof which is great for our dog and kids.
Another option over carpet are carpet squares. They have some really awesome ones that don’t look like you are in an office. When one gets damaged, you just have to replace a single one.
Home Improvement Ideas to do Today
You spend a lot of time at home and therefore I believe it should be somewhere you enjoy spending time. I hope these home improvement projects in this list will give you some ideas on how to turn your space into a place you love. No matter what project or room you tackle, light and color are key. Be creative on adding light through paint LRV, light bulbs, windows, or mirrors. Add functionality by improving storage and organization with shelving systems. Create an accent wall or an awesome mudroom wall with board and batten.
If you have any awesome home improvement project ideas, then add them in the comments for other readers to find!
If you found this post on home improvement ideas helpful, please share it on Pinterest or Facebook


I am a wife, teacher, and mother to two awesome girls. I write about what I am passionate about, which includes being a mom, house projects, beauty and skincare. I love to share my experiences, failures, and successes with my readers. Let this space be a resource for you to pursue your very best day.