
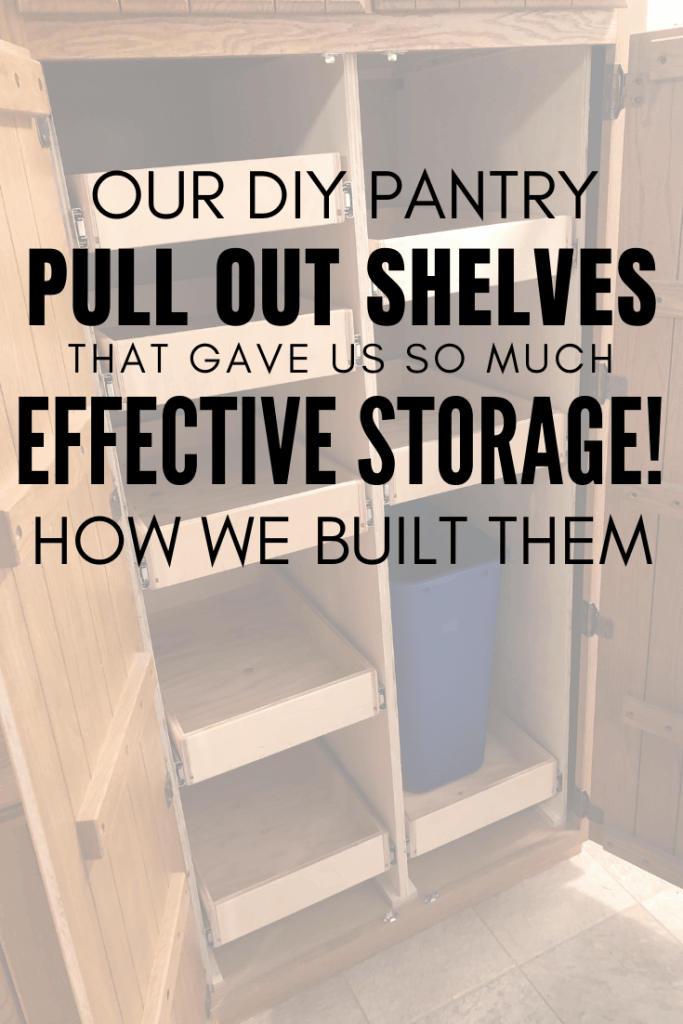
Pantry organization is key to having effective kitchen storage and the reason behind why we ended up with DIY pull out pantry shelves to gain more effective storage.
Our original pantry had a poorly designed organizational system that needed to be removed. However, we didn’t want to just add shelves.
Based on the dimensions of most pantry cabinets, shelves are just too deep to effectively use the full shelf. You would never be able to find items in the back.
Our research led us to the idea of pull out pantry shelves, which are a game changer because you can really utilize the full depth of the shelf.
So, after much thought, we opted to try and do DIY pull out pantry shelves.
Here is the process we used and everything we learned in this DIY home project.
Table of Contents
Total Material List for DIY Pull Out Pantry Shelves:
Before jumping into the guide, here is a succinct material list to give you a sense of the project cost:
- (8) 22-inch Everbilt Soft Close Drawer Slides
- (1) 4’x8′ sheet:
- 3/8 inch sanded plywood (for drawer bottoms)
- 1/2 inch sanded plywood (for pantry frame)
- 3/4 inch sanded plywood (for pantry frame)
- (1) 5’x5′ sheet:
- 1/2 inch baltic birch (for drawer sides)
- Wood glue
- Polyurethane, clear
Tools Used:
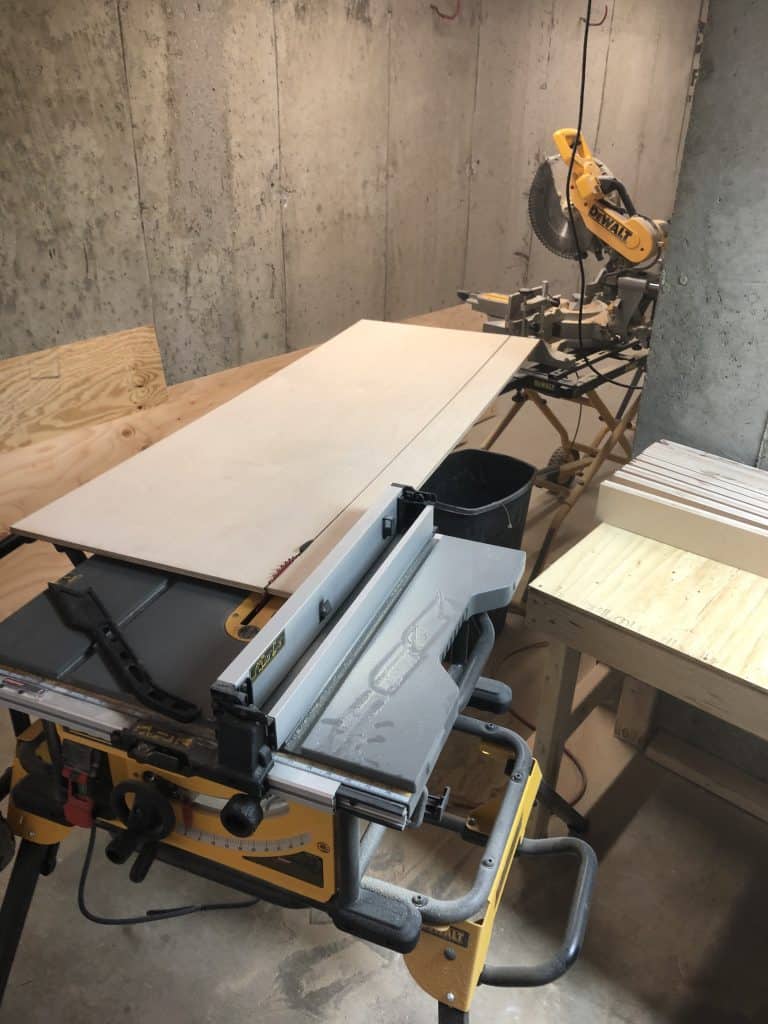
- Table Saw (with dado saw blade set)
- Miter Saw
- Hand Sander
- Power Drill
- Level
- Clamps
- Brad Nailer with Air Compressor
- Foam brushes
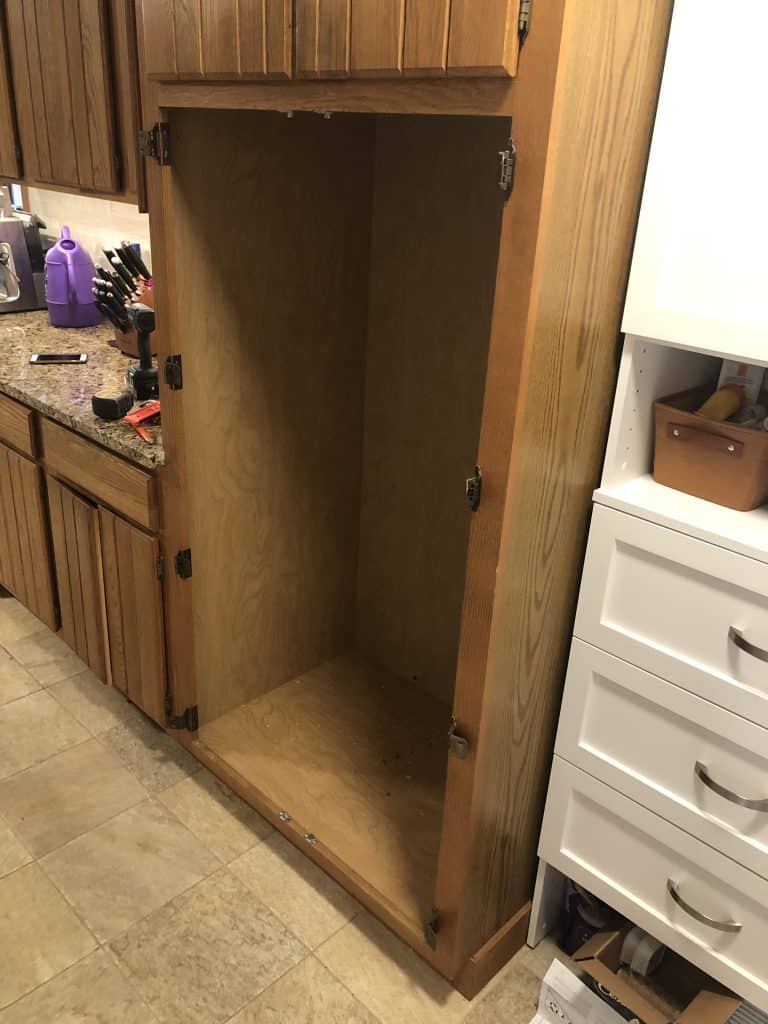
Our Original Pantry
The pantry that came with the house had a very elaborate organization system built-in, however, it wasn’t very effective.
The organization compartments were all so small that the biggest item we could fit was a box of Mac n’ cheese. This meant there was no space for crackers, cereal boxes, or chips. Additionally, you had to open both doors to be able to look behind the organization system to see the small shelves in the back, where you could fit only one row of items. The shelves in the back were so small, items would continuously fall.
So, after living with it and trying to make this system work for us, we decided to ditch it.
After seeing how much a new pantry would cost (~$500 for half the size of our pantry not including the pull-out drawers), we decided to take on this DIY Pull Out Pantry Shelves project. The total project costed us ~$300.

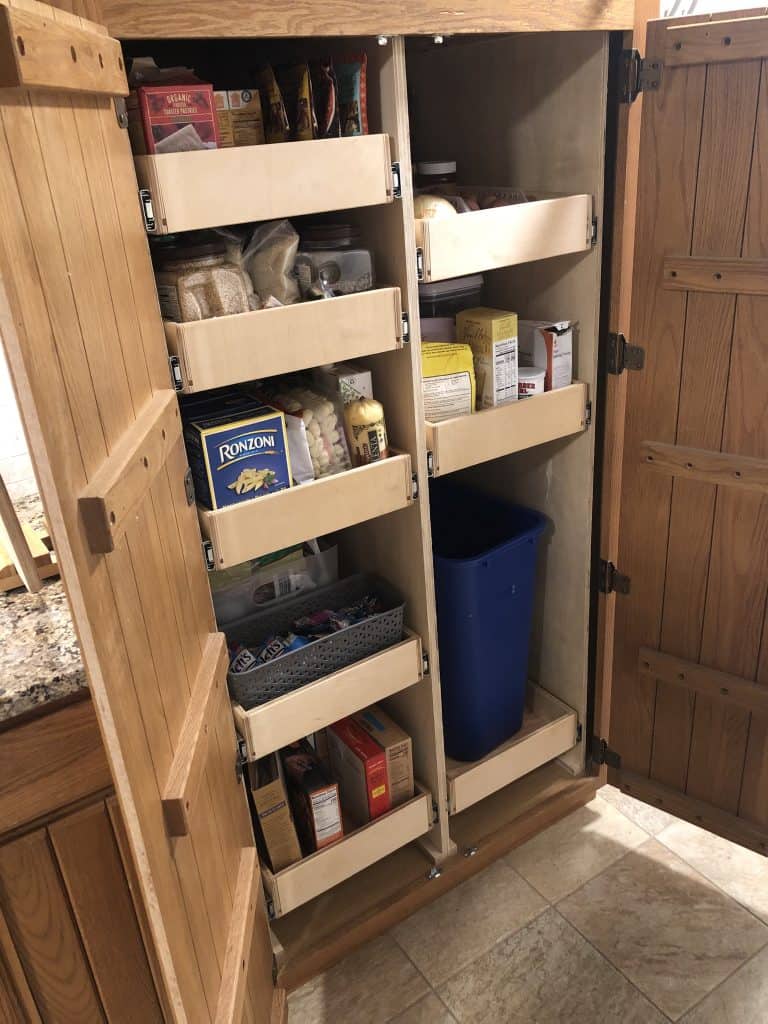
Sneak Peak at the After
Planning Steps
Before you embark on the project you need to do some planning:
- How many drawers do you want?
- Is the placement of your drawers restricted (I.e. by cabinet doors)
- Do you want to be able to just open one side without opening both cabinet doors?
- Do you want a single column of drawers or multiple?
Part 1: Prepare Your Pantry
Tear out whatever is existing, cut out any nails that are poking through. Clean up the space.
Part 2: Build Your Frame
I didn’t want to attach directly to the cabinet because our cabinets were only 3/8” thick, meaning I didn’t trust that they could hold the weight of the drawers and its contents. And it would have been very difficult to screw in the slides at just the correct depth so the screws didn’t poke through and show on the other side.
Initially I went cheap and attempted to build a frame out of 2x4s, which cost about $35 for material. Don’t do this, 2x4s are not perfectly straight. When I went to install my prototype drawer I quickly realized that there was too much inconsistency with the widths of the opening and the drawers would be a nightmare to install.
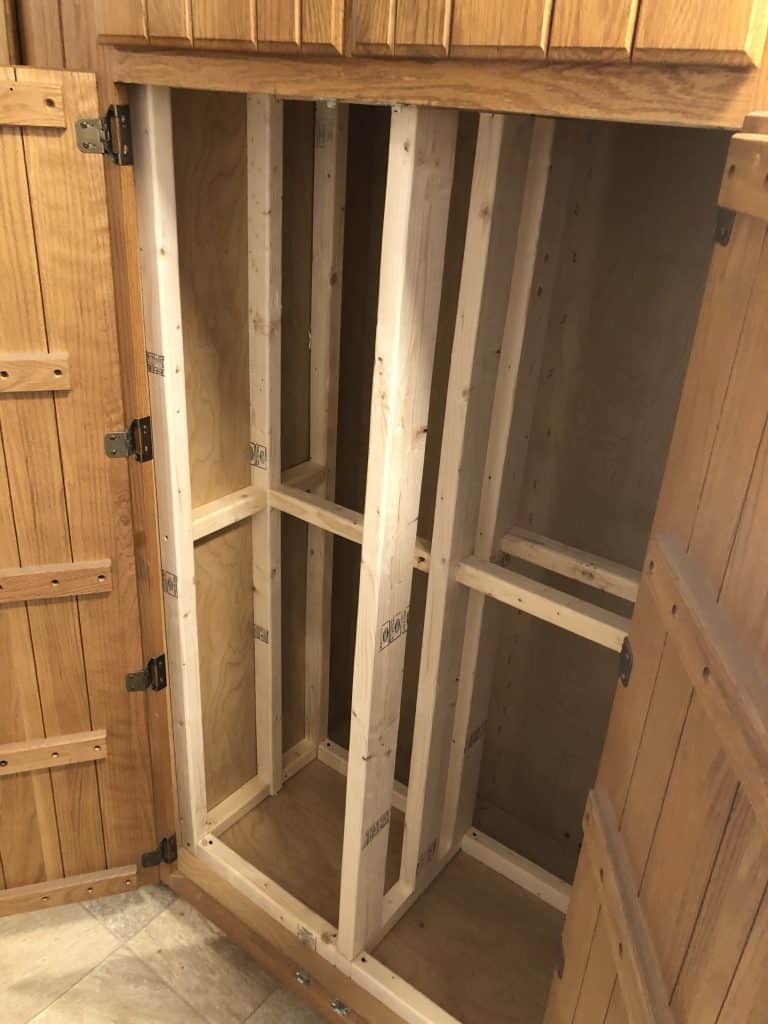
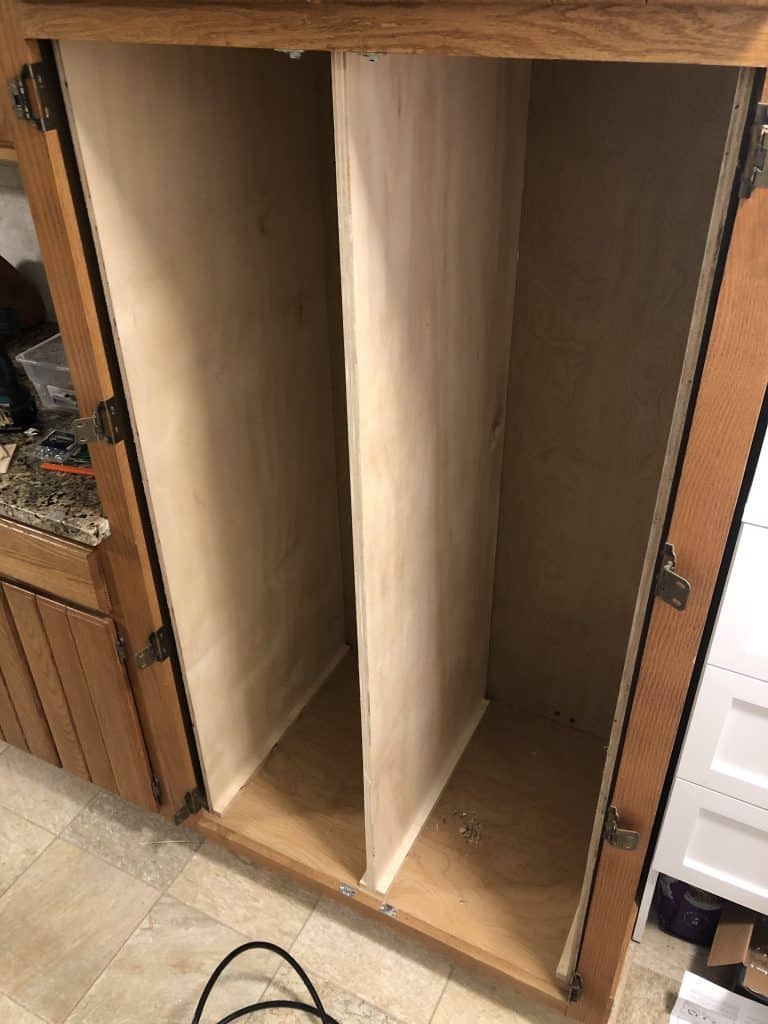
Instead just spend the extra money and do it right. I used ¾” sanded plywood down the middle and ½” sanded plywood on the sides. Our measurements meant we had to buy one 4’x8’ sheet of each (~$100). I had Home Depot make the initial cuts to make it easy to haul home.
Step 1: Install center support (if applicable)
If you’re going for a two column set up like we did, then start with the center piece. Measure the distance between the board and the side of the cabinet at all four corners (back right, back left, front right, front left) to ensure that this center board is exactly centered.
Cut ¾” strips from your excess plywood to use to brace this center piece. Once the board is exactly centered, attached the strips on either side of the board at the top and bottom. You can just use a hammer and nails, or better yet a brad nailgun.

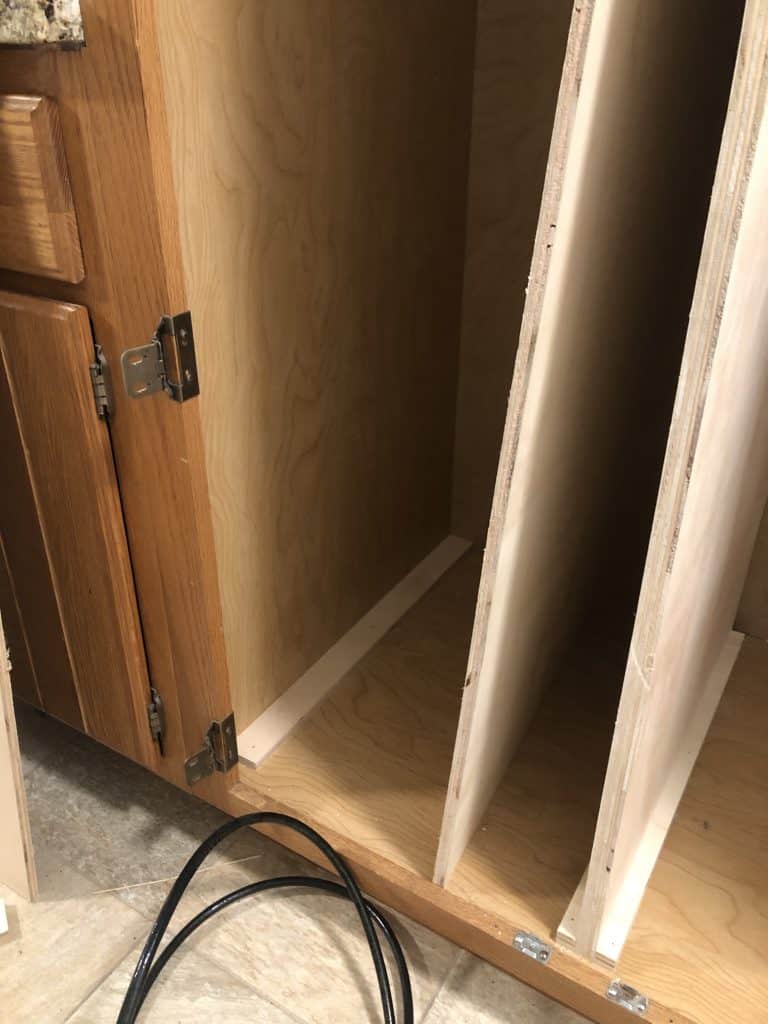
Step 2: Install spacer for side boards
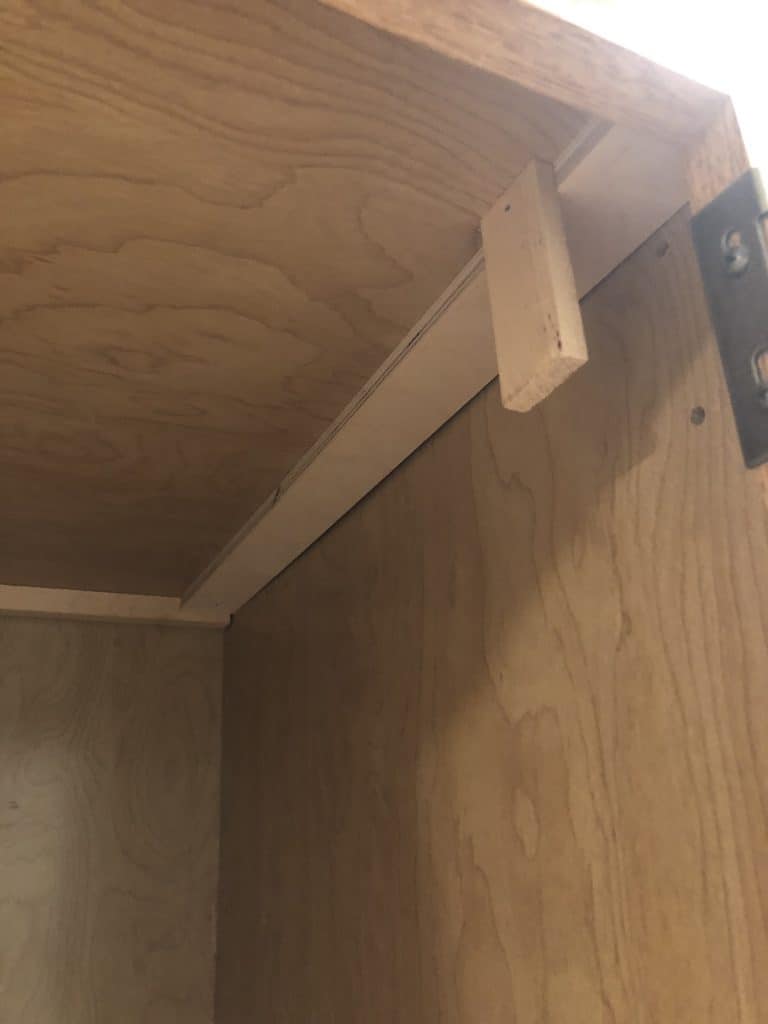
If your pantry is anything like ours, there will be a lip where the opening extends over the inside of the cabinet, which means you’ll need a spacer for your side boards. Measure the width you’ll need to clear the lip of the cabinet and cut a piece of your excess plywood. Install it at the top and bottom, since this board is thicker you can screw them in or again use hammer/brad nailer.
Step 3: Dry fit your side board, measure distance between middle board
It’s very possible that your cabinet is not perfectly square. Before you attach the side boards, measure all four corners to ensure they have the same distance. If they don’t then you attach shims to your spacer boards where needed.
Step 4: Secure your side boards
Similar to how you secured the center board, use ¾” x ¾” strips to secure the side boards in place.
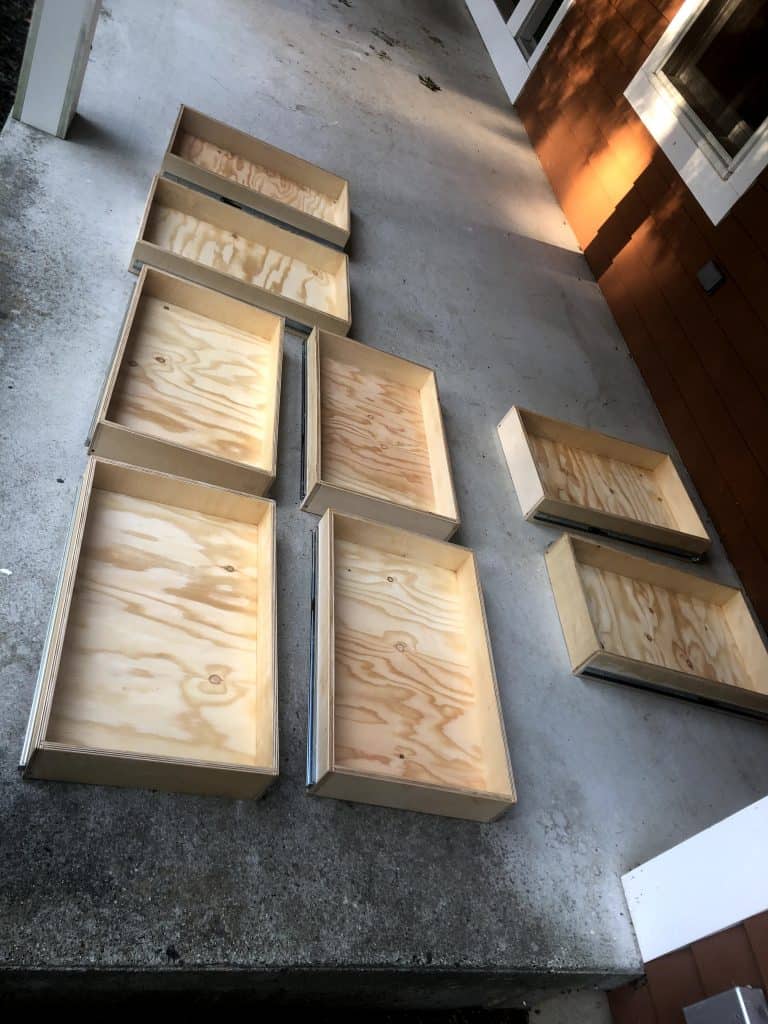
Part 3: Build Your Drawers
Now for the fun part! Once your frame is built, you’ll know the exact dimensions of drawers. Just remember to factor in the widths of the drawer slides. The drawer slides I used were each ½” wide, meaning my drawers were 1 inch narrower than the space.
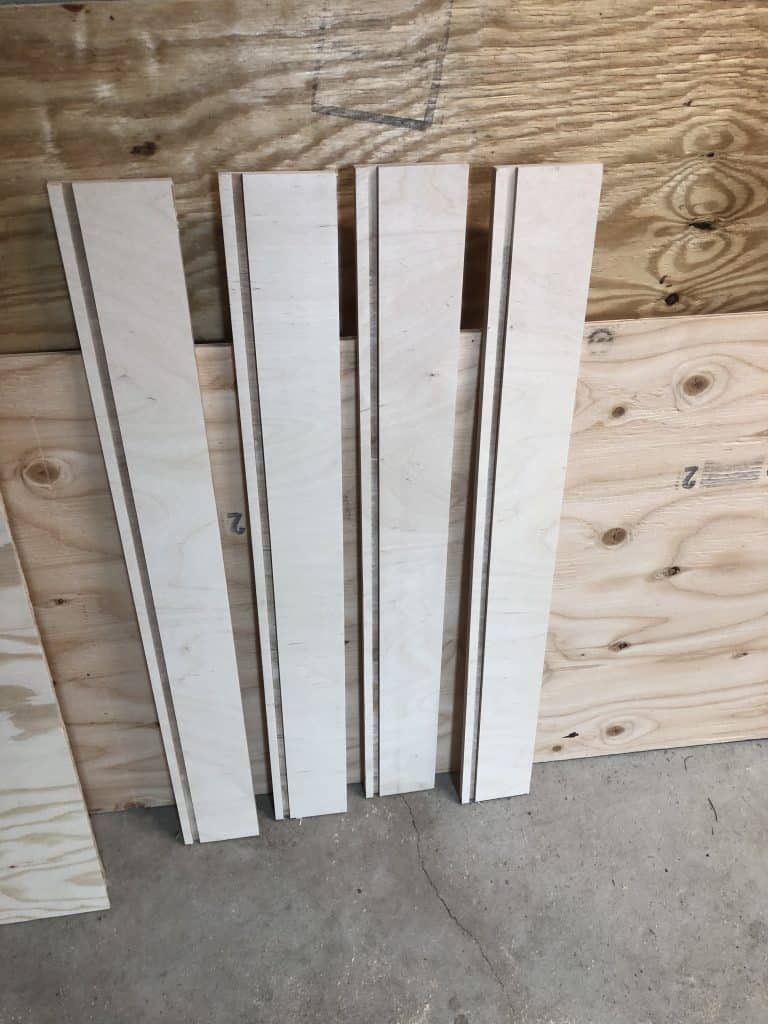
Step 1: Cut your drawer sides
For the drawer slide I used ½” thick Baltic Birch plywood. Baltic Birch is ideal for drawer slides because it it perfectly straight and will not warp. For the height of the drawers, I made these 3.5” because that’s what we had in some other cabinets and I liked the feel of it.
Step 2: Cut the drawer bottoms
For the drawer bottoms, I used 3/8” thick sanded plywood. You could probably get away with ¼” thick if you wanted to save a few bucks but I’ve had bad experiences with drawer bottoms sagging, so I opted for the thicker material.
The drawer bottoms are going to extend a ¼” into each drawer side. So if your drawers are 15” wide, then the underlayment should be 14.5”. Same for depth. Our drawers were 22” deep, so I cut the drawer bottoms to be 21.5” long.
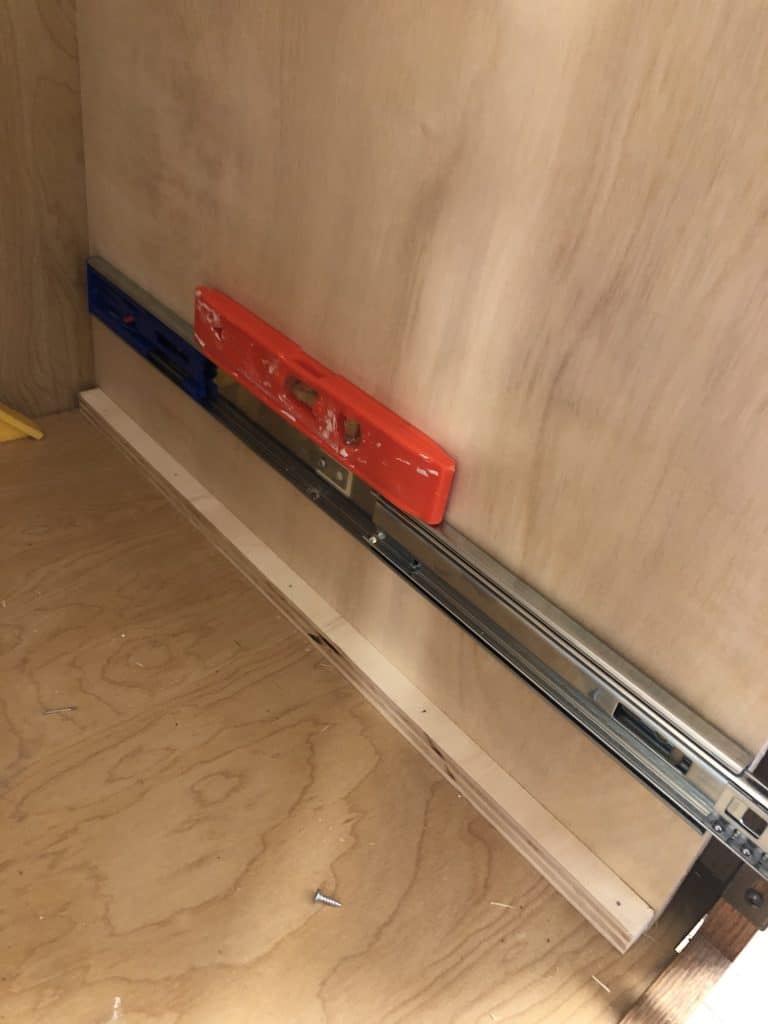
Step 3: Determine the dado width and cut your dados
This step will take some time as you’ll be adjusting your table saw a lot. You want the groove that the drawer bottoms fit in (i.e. the dado) to be snug, but not too snug. In the picture below, the groove was a little bit too large, so I decreased the size of a dado a bit and it fit perfectly.
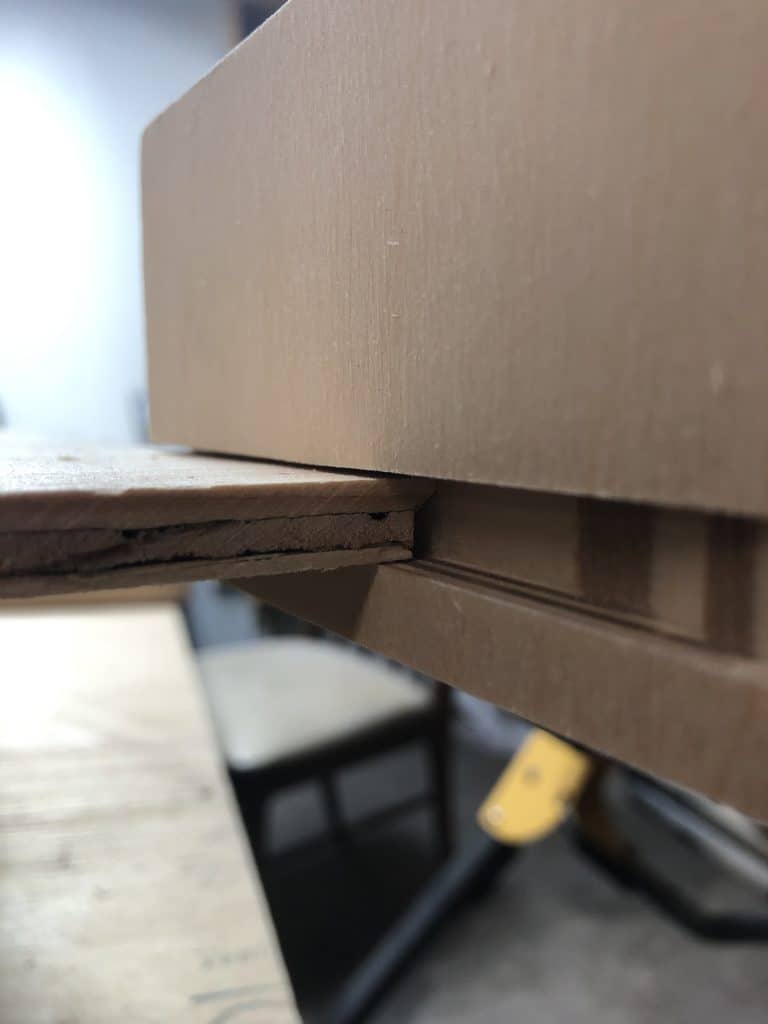
Once you’re happy with your dado settings, you can dado all the drawer slides.
Step 4: Make your prototype drawer
There are many different ways to fit drawers together. I started with this method, but the thin outer strip was too weak and kept chipping off.
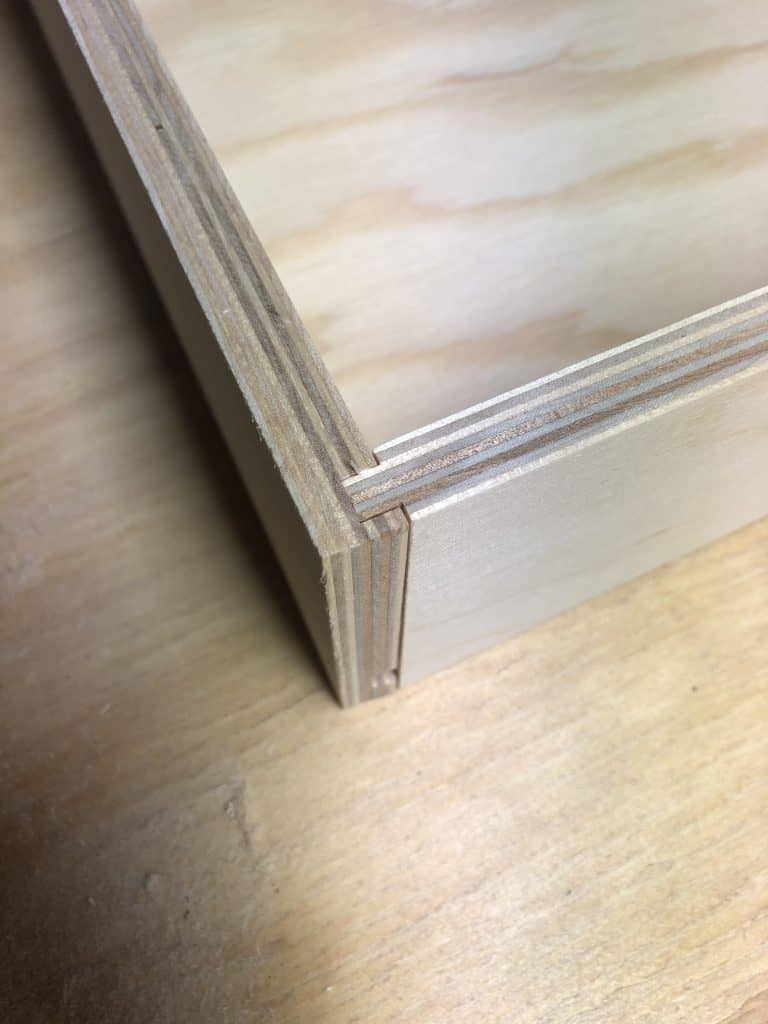
Eventually I figured out a simpler design that was stronger and easier to re-produce. The front and back pieces are cut so that ends on the exterior are notched. This leaves a tongue that will fit into a groove on the sides of the drawer. This is better seen in the next section.

Step 5: Glue it together
Once you’re happy with your measurements and design, it’s time to glue them together. Here you can the tongue and groove system that I used.


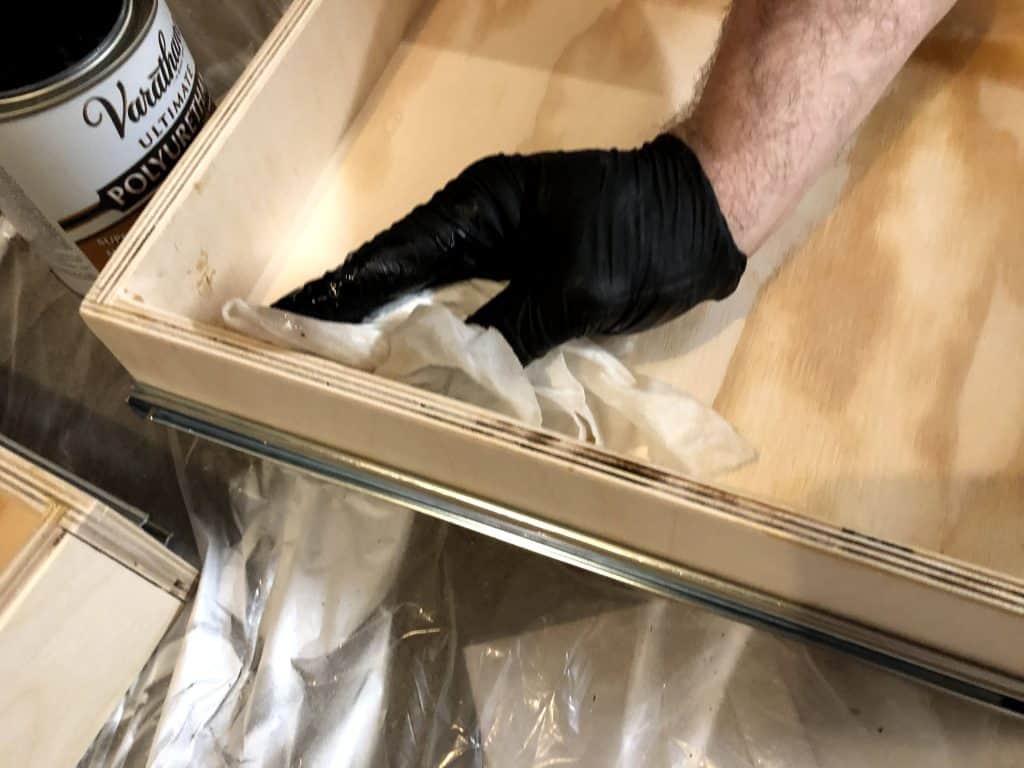
Part 4: Seal the drawers
You’ll want to apply a clear coat of polyurethane on the drawers to protect them from spills and give them some added durability. I did this after installing them but wished I had sealed first, that way I wouldn’t have had to work around the drawer slides.
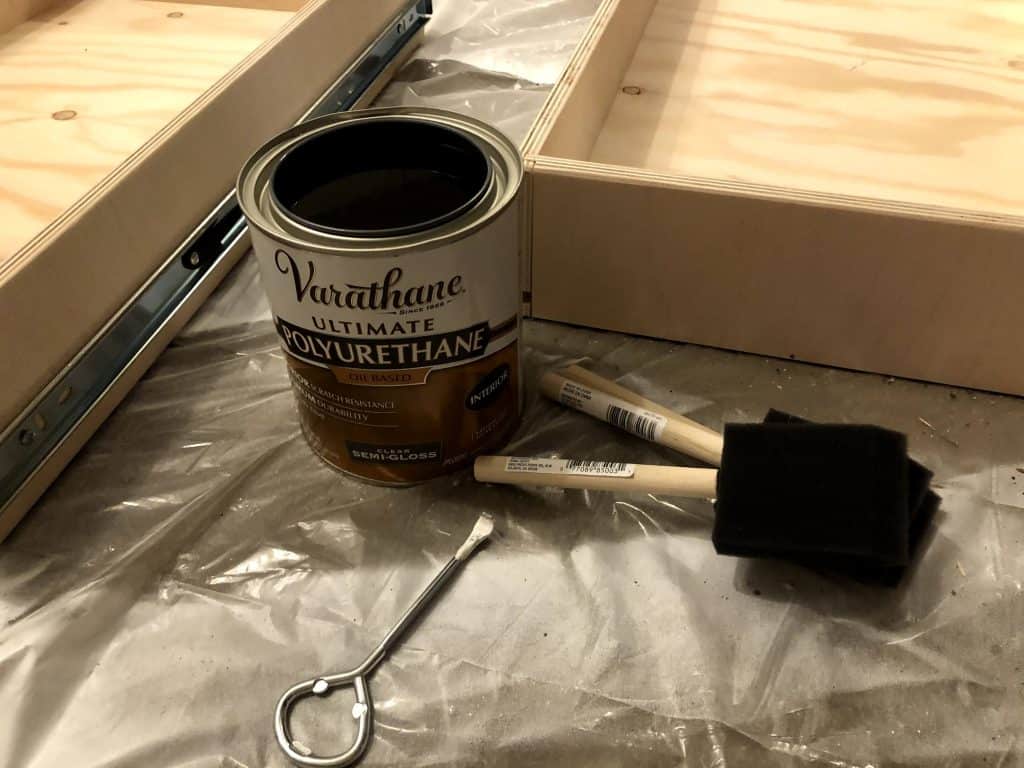
You can either brush it on with foam brushes or use lint free rags and rub it on. Just make sure to wear gloves if you go this route.

Part 5: Install the drawers
Installing the drawers was very frustrating at first but became easy once I mastered the process, which is outlined below.
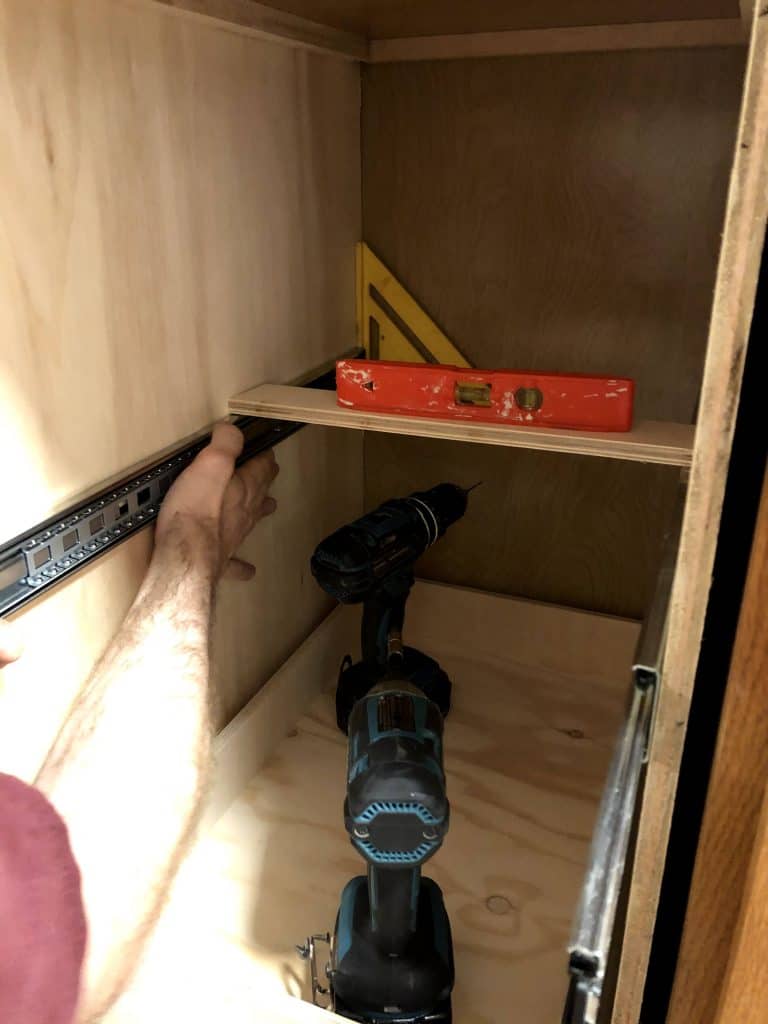
Step 1: Screw in the center of the first drawer slide
Find an item with the right thickness that you’ll use to keep the depth constant. I used a square. Once you have your desired height, pre drill through the center screw-hole. You can just screw it in instead of pre-drilling, but I found pre-drilling to be easier that way I didn’t have to hold it perfectly in place while fidgeting with the screw.

Step 2: Level the first slide and screw in the front and back
Step 3: Combine step 1 and 2 for the other side
For the other side, I recommend cutting some scrap Baltic birch to the exact width of the opening. You’ll use this to level the second drawer slide off the first one. Again, pre-drill your center hole when everything is perfect since it’ll be difficult to hold everything perfectly in place.
Step 4: Rinse and Repeat for all the drawers!


Step 5: Stock Up and You’re Done!
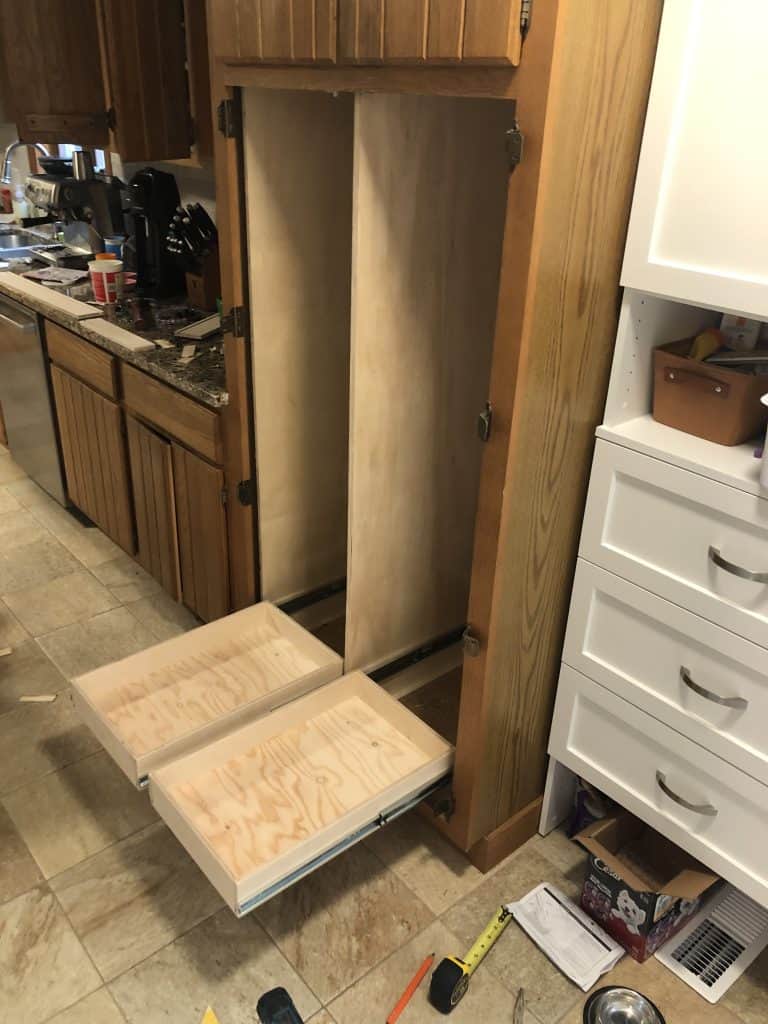
When we finally finished and I got to put the kitchen back together, I was so excited. I not only was able to better organize the items but also fit so much more into our pantry.
By adding these DIY pull out pantry shelves, I was able to put all the original items back into the pantry in addition to the items of two full upper kitchen cabinets. This freed up so much more space for other items in the kitchen.
Lastly, we now have a space for a recycle bin, so we aren’t running to the garage every time we want to throw something in the recycle.
DIY Pull Out Pantry Shelves
Hopefully sharing our experience with making our own DIY pull out pantry shelves gave you some inspiration on how to improve your kitchen organization.
Overall, the project added a lot of value to our house in terms of effective use of space.
Additionally, by doing it ourselves, we were able to save a lot of money and use the existing cabinet frame.
If you found this DIY Pull Out Pantry Shelves guide helpful, please share it on Pinterest or Facebook


I am a wife, teacher, and mother to two awesome girls. I write about what I am passionate about, which includes being a mom, house projects, beauty and skincare. I love to share my experiences, failures, and successes with my readers. Let this space be a resource for you to pursue your very best day.
45 Pantry Shelving Ideas and Projects - DIY & Crafts
Thursday 17th of October 2024
[…] your kitchen organization with these DIY pull-out pantry shelves. It is easy to follow; it allows you to create a tailor-fit storage system that meets all your […]
Diy Pantry Shelves: How To Build Yours - Diy Folly
Sunday 26th of May 2024
[…] image source […]
25 DIY Pantry Shelves to Construct Yourself
Tuesday 3rd of October 2023
[…] pursuetoday […]
25 Useful DIY Pantry Shelves You Can Build - DIY Crafts
Sunday 9th of July 2023
[…] All you need is a table saw (with Dado saw blade set), miter saw, hand sander, power drill, level, clamps, brad nailer with air compressor, and foam brushes. Follow these step-by-step instructions for installing the perfect shelves that are sure to meet all of your kitchen needs. With durable construction materials and simple assembly techniques, you’ll be able to maximize your pantry space quickly and easily! pursuetoday […]
21 Easy DIY Pantry Cabinet Ideas with Plans
Thursday 20th of October 2022
[…] Tutorial: pursuetoday.com […]