
When we moved into our house, I was overwhelmed by how much oak wood was in the house. The floors, trim, windows, doors, stairs were all oak. The cabinets in the kitchen and every bathroom cabinet was oak.
There was no color to break up the oak and it made the space look outdated, dark and smaller. After moving in, my first priority was to find out everything I could about painting oak wood white.
Here is everything I learned after painting over 2200 square feet of trim white and the absolute best how to guide on painting oak trim white.
Table of Contents
Should I paint my oak trim white?
The decision to paint the trim in your house white really comes down to a style question of if you like that look. If you don’t like the color it is now, then you should change it.
In addition to really liking how white trim looks, the other reasons we painted our trim, windows and doors white were:
- What is the condition of the trim? Some of our trim was very old and really couldn’t look nice unless we either replaced or painted it.

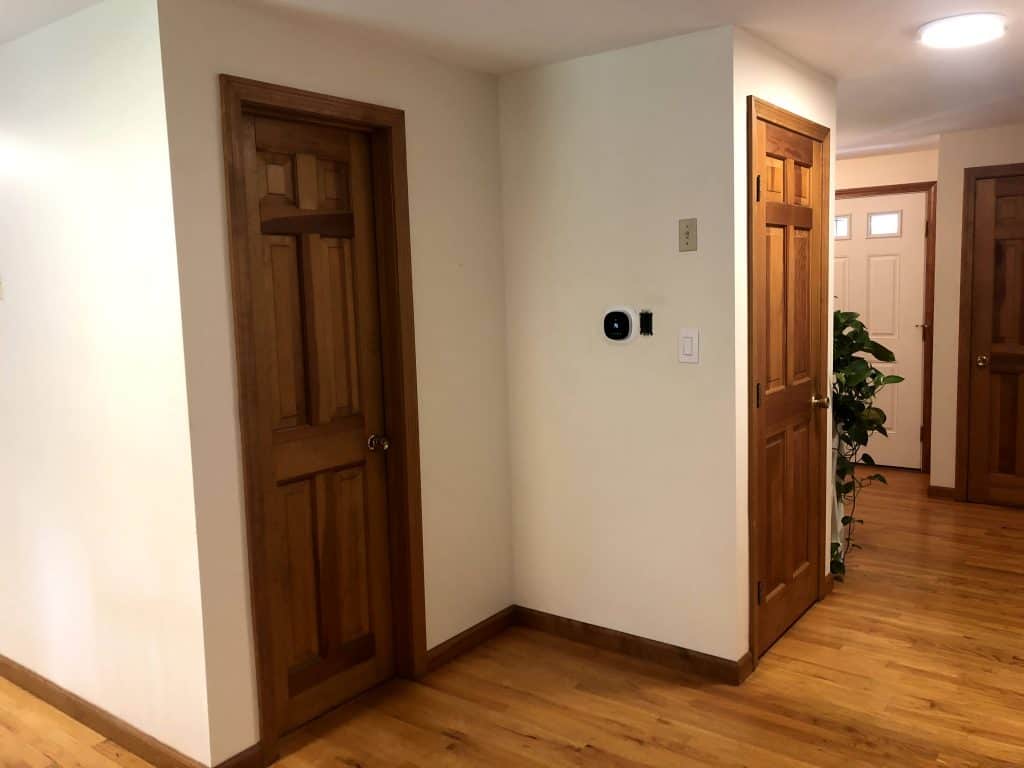
- Do you want more “light” in your house? White has a high LRV (light reflectance value) so that means it will bounce more light giving your space a brighter feel. As you can see in this photo, our house could use some more brightness.

- Do you have a mixed theme? In our house, some of the doors are white and some are wood. Additionally, the frames in the window are white but the windowsills are wood. Painting the trim white will give the space a cohesive look.
- What color of trim goes best with your color scheme? Our oak trim had a very orange color to it and that meant we either had to work with it or change it. I love white trim because it goes with any color. For example, here is our daughter’s bedroom that is pink. The white trim (window in original trim color) was so much more complementary to pink than our original oak.

Are you okay with a “bigger” project than just painting oak trim white?
Changing colors in a room is a powerful way to transform any space but as you change colors, other colors might also have to be changed.
- We know that if we changed the trim, we needed to also paint all of the windowsills and the doors.
- We also realized that if we paint the windows, then the shades wouldn’t look good at all. As you can see in this photo. And I do have a plan to fix this with white spray paint that coats plastic and another white spray paint that coats fabric.

- We knew that if we painted the trim, then we would want to change the wall color in the main living space.
- We also know that there is a good chance we will have to change, or stone coat the granite in the kitchen if we paint the cabinets.
Just know things like this could come up and you might not know until after you paint white that other colors now don’t work.
Paint oak trim or replace?
Another way to go from wood trim to white trim is to buy new trim and replace it. I ONLY recommend this is you have the appropriate tools and are very good at measuring.
We ended up replacing a few pieces because they were beyond repair. We had a few pieces of baseboard that were cracked and a few that had super old phone connections in them that left enormous holes.
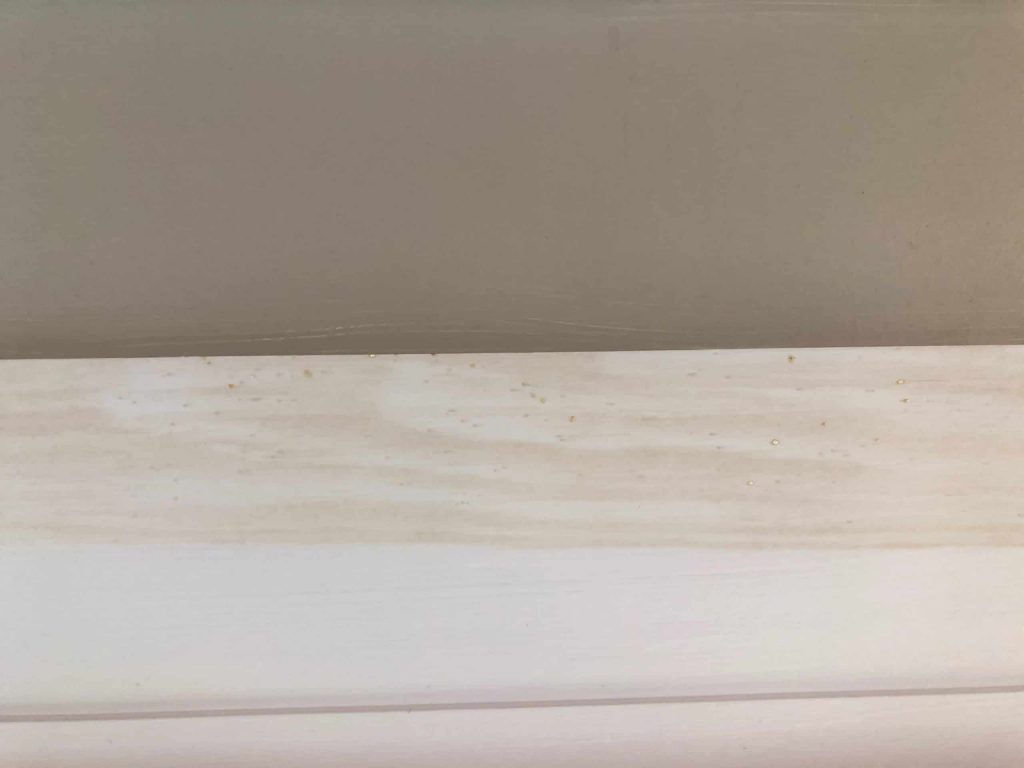
Replacing trim will be more expensive, but will take a lot less time. It will only require one coat of white paint (instead of 4-5 coats) because it comes pre-primed. You also never have to worry about the wood tannins coming through and giving you that yellow stained look. Here is an example of what can happen if the wood tannins come through.
Another thing to consider is that, you will have to use a grain filler on door trim if you have very harsh grain lines. It is not hard to do just another step.
How to Paint Trim
Now that you have decided to paint the trim, you are ready to start. I recommend starting somewhere that doesn’t matter like painting the trim inside of a closet. This allows you to perfect your technique.
How long will it take to paint trim?
The whole process can take anywhere from 3-4 days depending on how many steps you want to tackle each day. I recommend washing, fixing, and prepping the trim on day one. You want to wait until the next day to prime because you want the wood to be completely dry.
Almost all wood will need two coats of primer that will prevent the yellow stain from showing up on the white trim. Do not skip this step! If you have a very dark wood, then you might even need three coats of primer. You can prime on day two. Most primers can be top coated in one hour so you could get both coats of primer on and the first coat of paint on in one day. After you paint your first coat of white, I recommend waiting 24 hours until you apply the next. Painting a second coat on wet paint that is drying will make the paint sticky and give you horrible brush strokes.
If you plan on painting all the trim in the whole house, then it could take you a month to a few months depending on how much time you are spending painting. From my experience, I would recommend not rushing and taking breaks when you get sick of painting. If you don’t, then you will get sloppy.
How to Pick a White Paint?
Before you start painting, a critical step will be picking a paint color and type. Before starting this process, myself, I really didn’t think about the fact that there are hundreds of colors that are all white. This is because they all have different undertones. The very important part to remember is that white will look white until you pair it with another white.
White Paints can change color based on surrounding colors
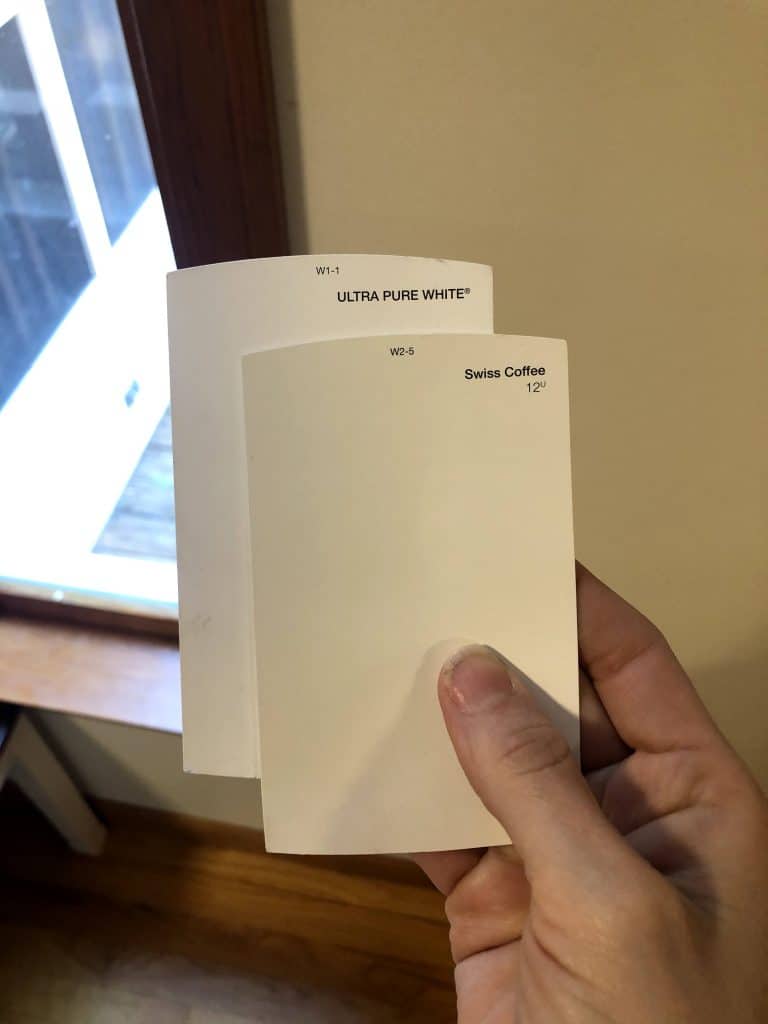
When you put two whites next two each other, you will see the undertones and one will appear white and the other will appear yellow, grey, brown etc. In this first picture, you can see that the color Swiss Coffee appears white.

Now if we put Swiss Coffee next to another white like Ultra-Pure White by Behr, you see the undertones and Swiss Coffee. Therefore, it is important that you “only” have one white in your house.
Find out what white paints are already in your house
Start by finding out what white (ceiling color, cabinet color or door color) you have in your house and match it. It is best to stay with this color. If you don’t, then you risk your ceiling or cabinets or doors looking yellow or another undertone color.
The white we picked for our trim
The only white in our house was the ceilings, which had minimal undertones. We tested three different whites.
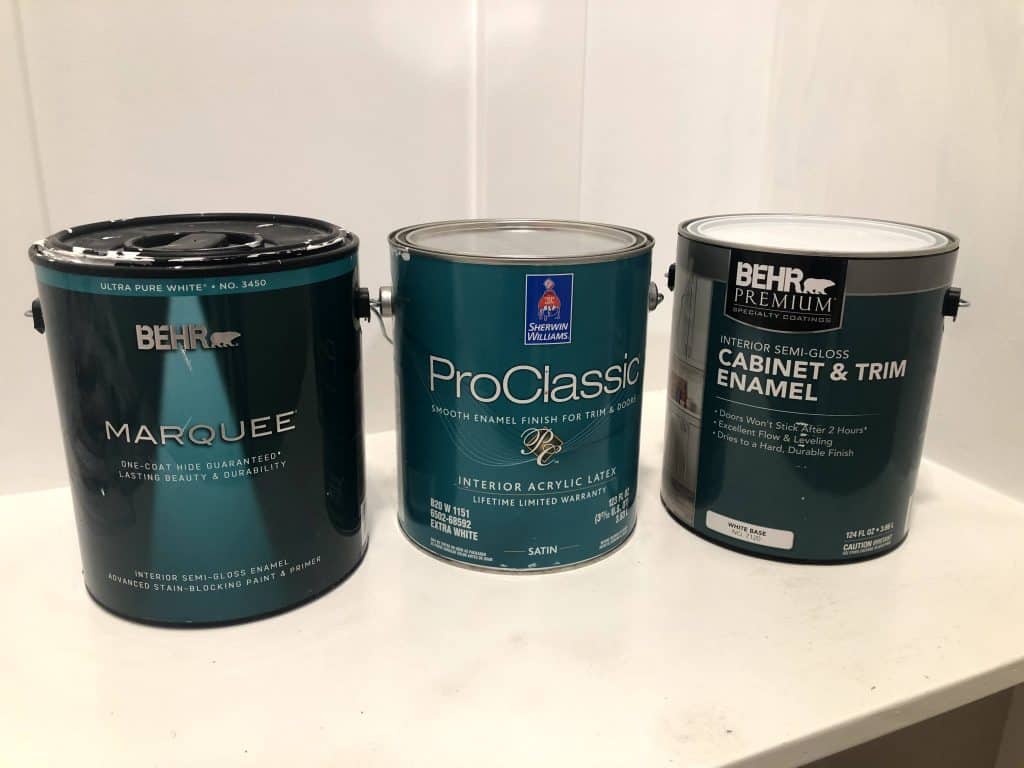
We decided to go with Ultra-Pure White by Behr in the Marquee Base (it is so much better than the Behr Premium Base) because it matched our ceiling color best. It won’t look yellow or pick up any other colors. It is also very bright with a LRV of 94 and we wanted to maximize making the space feel bright.
The other top contender was the Extra White by Sherwin Williams.
Stay with the same brand and base
Also know that you can mix and match any color with any brand. For instance, you can get Benjamin Moore colors at Home Depot in a Behr paint can. But once you start, you will always want to get the same color in the same base. Since all brands have a unique starting base so the color will vary slightly between brands.
Pick a finish
At most paint stores, they have this very helpful chart that tells you what finish to use depending on what you are painting. For trim, the most common and recommended finish is a semi-gloss.
Steps to Paint Oak Trim White
There are really four steps to painting trim: wash, fix, prep and paint. If you read other tutorials, then you will see they all follow this same idea. I read so many tutorials before I started and took detailed notes. After reading and painting our trim, this became my method that worked really well for me.
Step 1: Wash the Trim:
Even if your trim doesn’t look dirty, you still need to clean it. Most surfaces have oil, grease, and a layer of dirt on them. I was shocked at how much came off. The best part is cleaning trim is actually very easy.
Start by gathering your supplies:
- Cleaning Bucket
- Water
- Lint free paint and cleaning rags
- TSP substitute
- Sponge
- Gloves
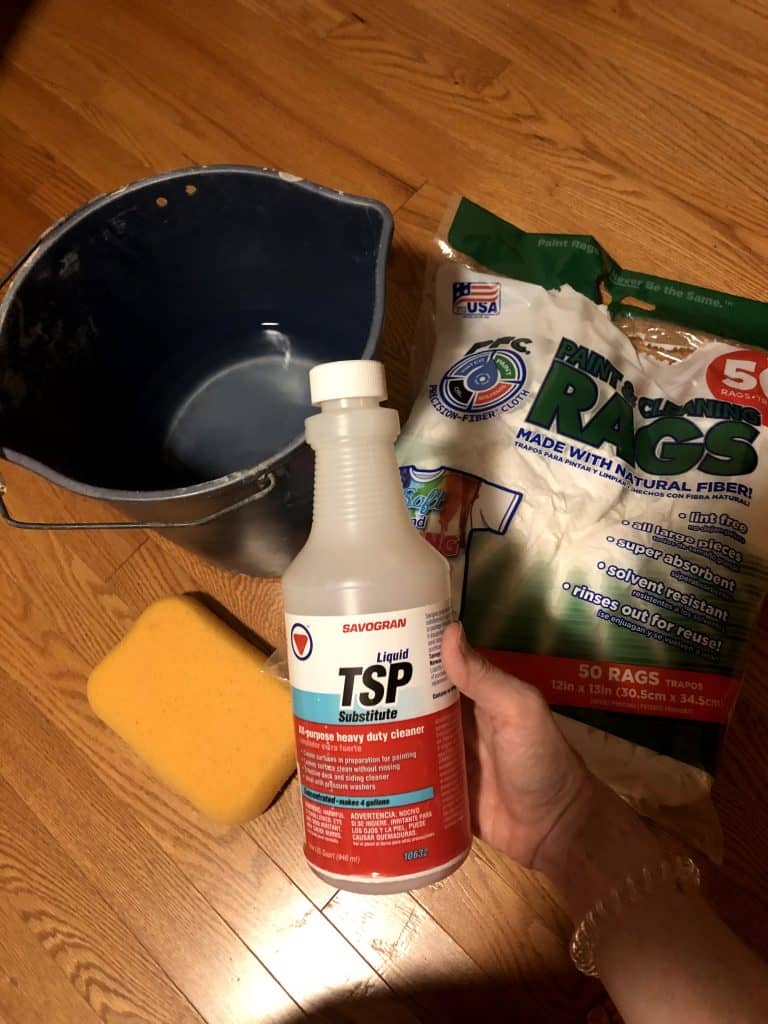
Put on your gloves and mix TSP or TSP substitute with water at the specific ratio listed on the bottle. I use a cleaning bucket to mix. The reason TSP is used before painting is because it doesn’t need to be washed off the surface with water after.
Now, take a sponge and dip it into your TSP water mixture. Ring it out so it is only damp. Now, wipe it across the trim. You want the sponge to be wet but not dripping. Be careful to not get it on other surfaces and if you do wipe it off before it dries so it doesn’t leave splotches.
Now, take your lint free rag and wipe the surface. That’s it! Just keep repeating until you have cleaned all the trim you plan on painting. I was very surprised at how dirty our trim was.

**The reason you need to wear gloves is that TSP is a skin irritant. If you get any on your skin, then wash it off immediately.
Step 2: Fix the Trim
Paint can do a lot, but it cannot hide existing damage. Painters say painting is 90% prep work 10% painting. I couldn’t agree more with this after painting so much of our house. Every time I think “paint will cover it”, I am always wrong. So take the time to make your surface smooth by fixing holes and gaps.
The two ways you can repair the trim is by using a soft wood putty to fill in nail holes or cracks.
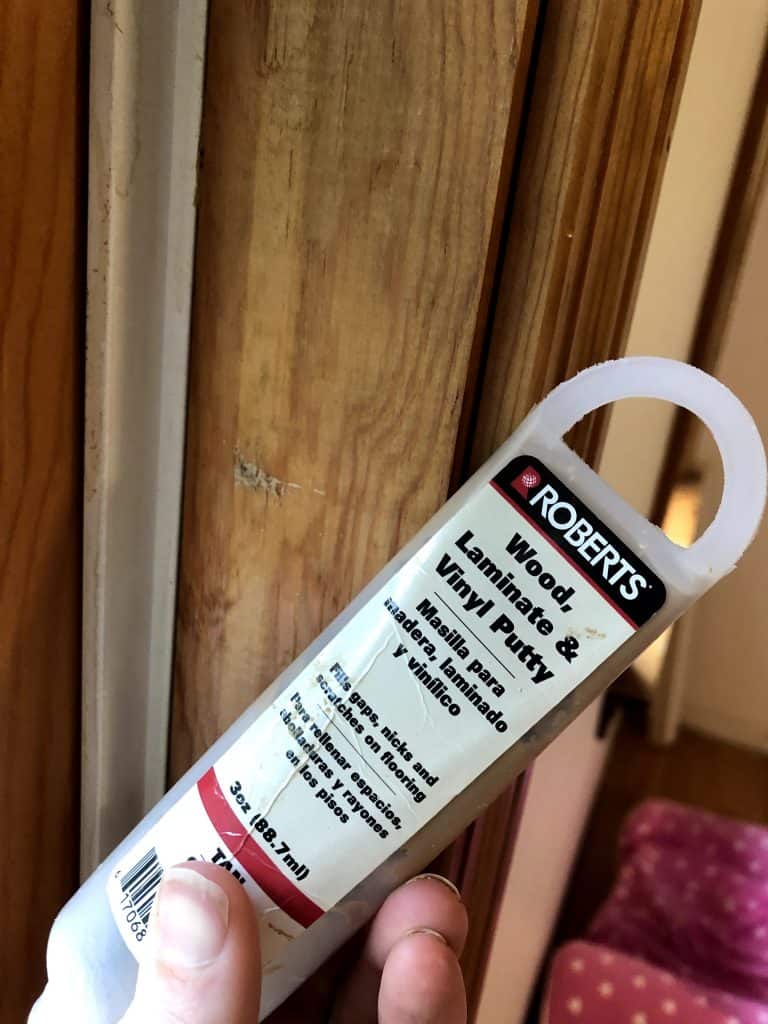
Basically, take a small amount on your finger and press it into the hole. You can wipe the surface with a paper towel or your finger to smooth the surface.

The other big way to make painted trim look really good is to caulk all gaps. You will want to caulk the gap between the wall and the baseboard. You will also want to caulk the gaps where baseboard meet a door frame. Just be very sure you are using a PAINTABLE white caulk. If it is not paintable, then the paint will peel off of it.
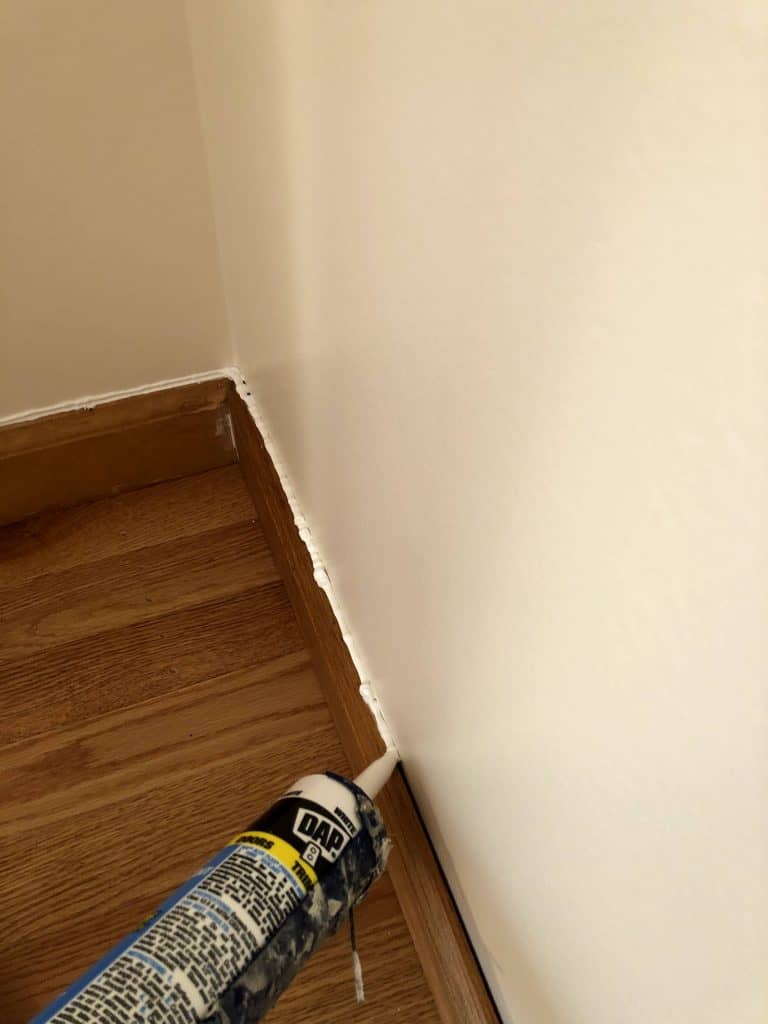
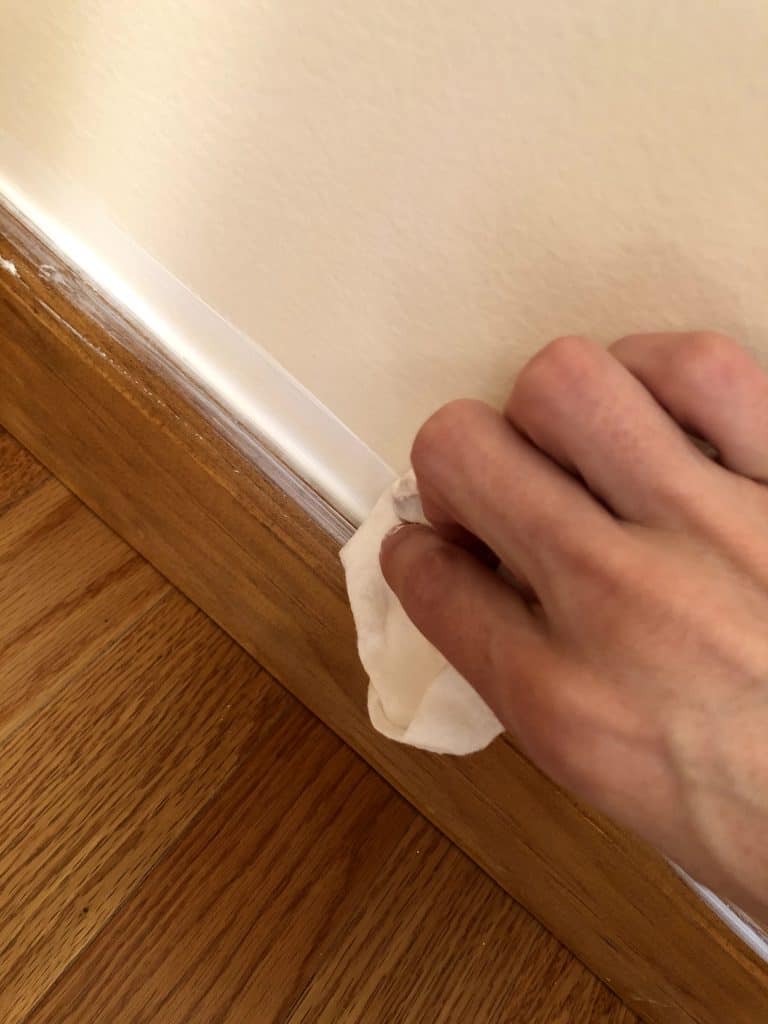
To apply caulk, use a caulk gun. You squeeze the handle until the caulk starts coming out and then run it along the gap. It will look something like the picture below. Next, take a damp paper towel and run it along the surface to smooth it out. Do that as many times as needed until you are happy with how it looks.
Supplies:
- Wood Putty
- PAINTABLE white caulk
- Paper towels
- Water
Step 3: Prep the Trim
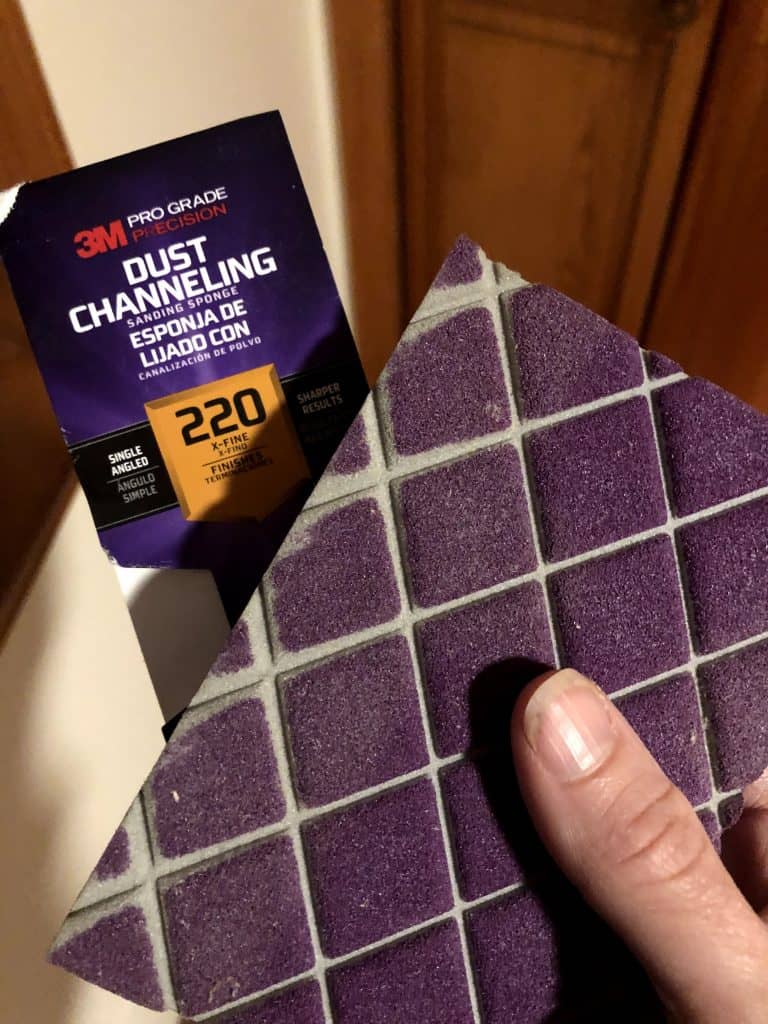
The last step you need to do before painting oak trim white is prep the surface to “grab” the paint. All wood trim will have a finish on it, which is why it appears glossy. Paint does not stick well to a smooth glossy surface. Using a primer will help the paint to stick but to help the primer stick, you need to do a very light sanding.
I recommend taking a sandpaper sponge (220 grit) since they are easier to work with than just the paper. Now all you need to do is lightly go over every surface. Your goal here is to NOT take off the finish but instead to just give it some texture.
After you go over each surface, take a vacuum and get all the dust particles up. And now you are ready to finally start painting! However, be sure that if you did all these steps in one day to be sure the wood is completely dry before painting.
Supplies:
- 220 grit sandpaper sponge
- Vacuum
Step 4: Paint
In total, you will be painting each surface 4-5 times depending on how dark the original wood trim is. No matter how light the wood trim is, you need to do 2 coats of primer. If you don’t get enough primer on, then you will just have to put on more coats of white. So really taking the time to prime well actually saves you time and supplies. The supplies you will need to paint include:
- Primer (stain blocking)
- 2” angled brush
- White Paint
- Paint Cloth (or something to cover the floor)
- Tape (or cut in which is my preferred method)
- Paper towels
- Water
- Flat razor (to get dried paint off the floor)
Tape the floor and wall (optional)
If you decide to tape, then start by taping the floor and wall above. I start by taping but found I got better results without taping. The tape pulled off some of my paint from the trim even after I cut the tape off. Most painters actually do not tape but take the time to cut in.
It takes practice to cut in but if you start with a closet, then you can practice and get your technique down. Additionally, keep a damp paper towel with you so you can easily wipe paint off of the floor or surface if you mess up. If you have an extra paintbrush, then you can wrap a damp paper towel on it and cut-in on the surface you didn’t mean to get paint on to get it off.
Put down a cloth to cover the floor
I bought this painters cloth to cover the floor and to give me a surface to keep all of the paint supplies on. I love it because it is not plastic and reusable. Also, I wash it from time to time to keep it nice.
Prime the surface
The primer I used is the Zinnser Bull Eye. I read a lot of reviews about different primers and felt that you can’t really go wrong with the Zinnser or the Kilz. They both have the stain blocking and can stick to glossy surfaces.

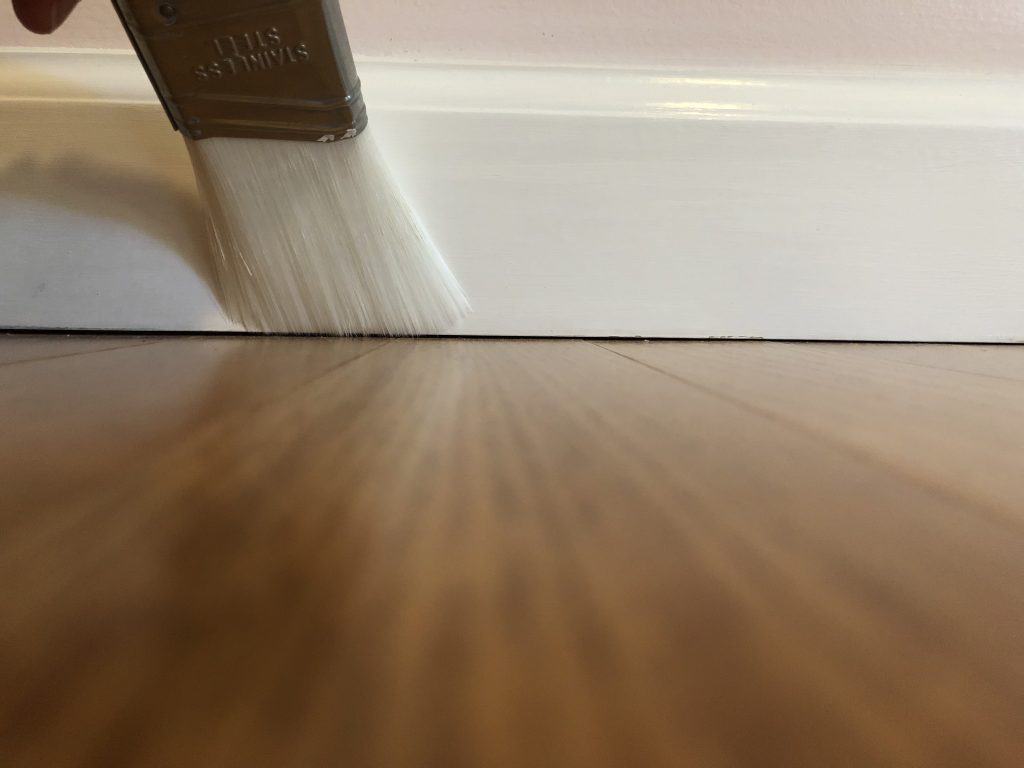
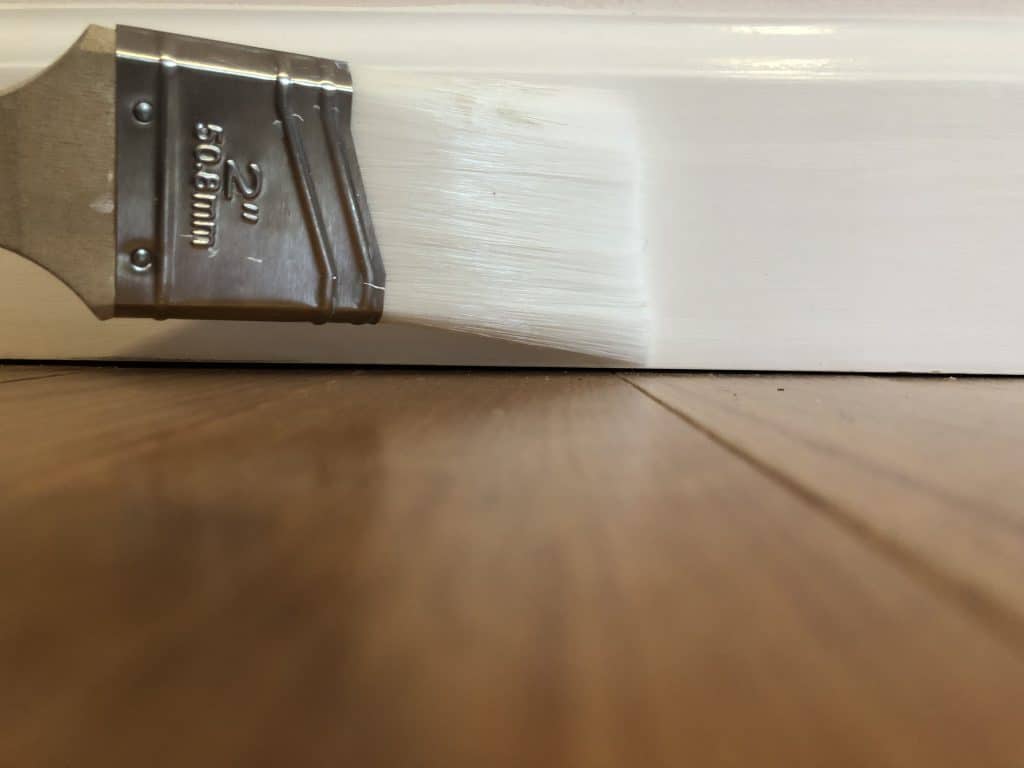
To prime, use a 2” angled brush. I like the Zibra 2″ angled Sash Trim Brush and a lot of people say you can’t go wrong with Purdy brushes. I start by cutting in the top and bottom. I then fill in the middle with long strokes to even it all out and make sure I don’t leave any bubbles of paint. Your goal here is to do a thin even coat.
As the primer dries, you will see the wood color since primer doesn’t have a lot of pigment. That is okay. The color will come from the paint. You can topcoat the Zinnser Primer in one hours with either another coat of primer or the paint. Here is a photo of painted door trim where you can see the two coats of primer vs. the first coat of white paint.

Paint White
You have finally reached the step you have been waiting for: painting oak trim white. Paint the white exactly like you painted the primer. Cut-in the top and bottom and then fill in the middle with long strokes. You also want to do thin coats that won’t drip. It is always better to do another coat than to glob it on. One tip to cut in is to wiggle the brush if you have small areas that need more paint.
Once you finish your coat, give the paint a full 24 hours to dry before doing another coat. After the first coat, you don’t need to worry about cutting in as close this time. The last coat of white I did was to just make nice even strokes to make it look better.
Tips to Cut-in and Paint Trim:
- Only dip the end of the paintbrush into the paint. Once paint gets into the top part of the brush, the bristles do not lay flat and it will be harder to get good brush strokes.

- After dipping the paint brush, tap it on the side instead of wiping excess paint off.
- Paint or dap on the surface before cutting in so you don’t have too much paint on your brush.
- When cutting in, try to angle your brush more to get a cleaner cut. In this first picture, the brush is not well angled. In the second picture, the brush is angled so that just the corner of the brush is cutting in and that is what you want.

- Move around until you get a good view of where you are cutting in.
- Have good light so you can really see what you are painting. I grabbed a floor lamp and brought with me to paint in addition to the overhead light.
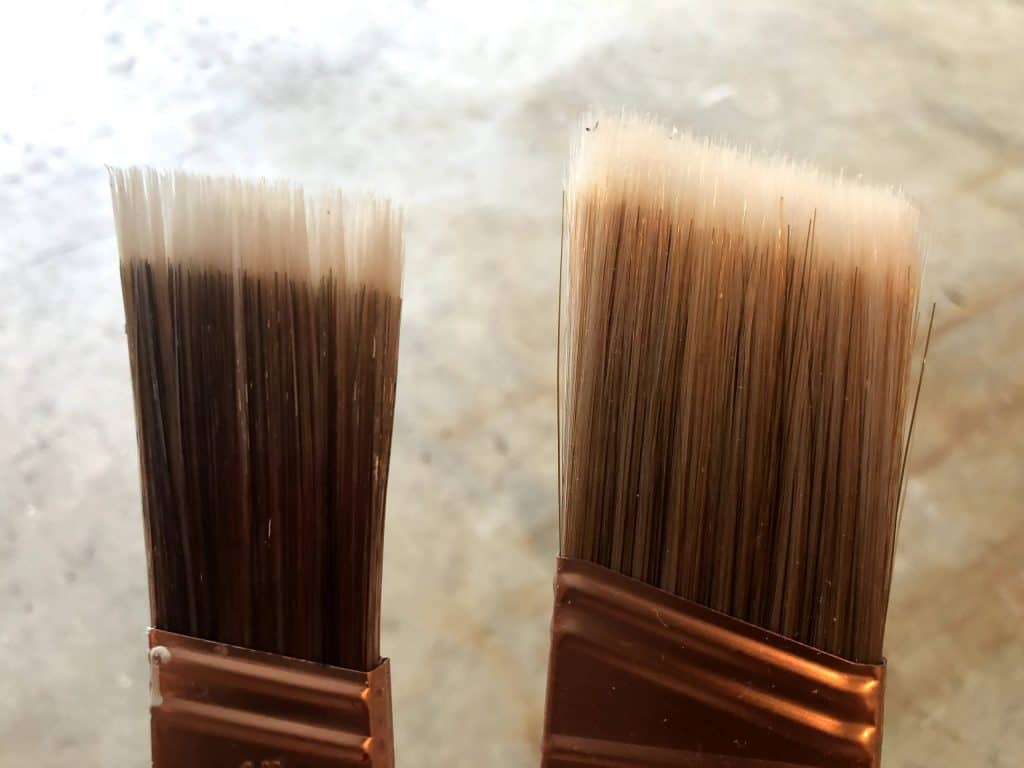
- Never use a wet paintbrush. Once you wash it, you need to wait until the bristles dry completely. The bristles will bunch if the top part of the bristles is wet with paint or water. In this photo, the brush on the left has bristles that are wet at the top where the metal holds them in line so they clump together.
- Always keep a wet edge meaning don’t jump around and work where the paint is still wet. Once paint starts to dry it will become sticky and painting a brush stroke through it will give you a lot of bumps.
Use a razor to remove dried paint off the floor (if hardwood or tile)
Protecting the floor will save you a lot of clean up time. If you do end up getting some paint on the floor, then take a razor to dried paint droplets and it will help you peel the paint up easy.
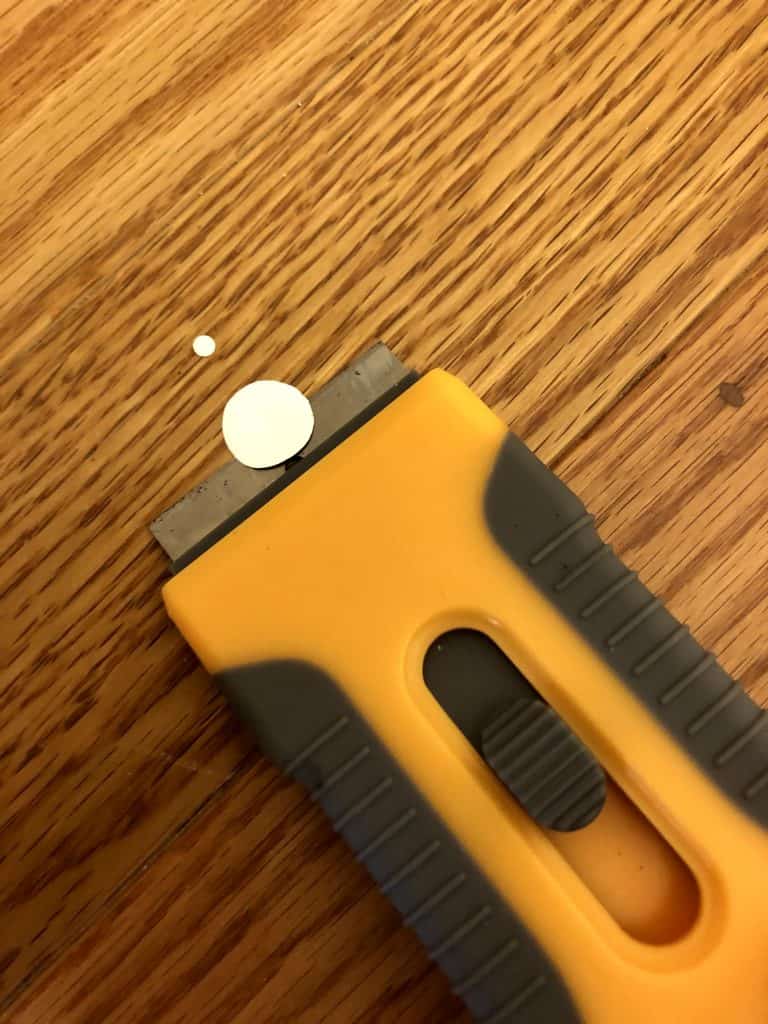
This only works for glossy flat surfaces (it doesn’t work for rough tile) but paint won’t stick to gloss but will peel, which is why it was so important that you sanded and primed the trim.
I also use this to get paint off the floor underneath the trim.
Painting Oak Trim Before and After

Painting all of the trim in your house can take some time and work but in my opinion is totally worth it.
We decided to paint our trim because the old trim made the house look outdated and dreary. I also didn’t like how it looked with the color scheme I wanted in our house. Additionally, the original trim was not in good condition.
After we matched the white to the existing white in our house and gathered our supplies, we were ready to give it a try.
We started in a closet in case we didn’t want to continue and so we could improve our technique.
In a weekend, we washed, fixed, prepped, primed, and painted the trim in two rooms. It was so beautiful I couldn’t wait to continue. A few months later and the white trim will completely transform every room in our house.
If you found this guide to painting oak trim white helpful, please share it on Pinterest or Facebook


I am a wife, teacher, and mother to two awesome girls. I write about what I am passionate about, which includes being a mom, house projects, beauty and skincare. I love to share my experiences, failures, and successes with my readers. Let this space be a resource for you to pursue your very best day.
Abby
Sunday 5th of January 2025
Would you use these same tips to paint a door and cabinets? I’m getting ready to paint our laundry room.
April
Friday 12th of January 2024
You have helped me so much! Thank you!!
Caelli
Thursday 14th of December 2023
Hi Emilia - great article! Very helpful! I too have oak trim that I am wanting to paint over. Did you notice if any wood grain shows through with the steps you've listed above? I'm trying to figure out if I need to add wood filler during my steps. I haven't started yet --- so nervous! Thanks for the feedback!
21 Home Improvement Ideas to Transform Your Living Space - Pursue Today
Monday 14th of February 2022
[…] bounce off now, whereas before all that dark wood absorbed light. I highly recommend it and wrote a tutorial on painting oak trim white since I learned so much in the process. Paint is very inexpensive and can make a gigantic […]
How to Paint Stairs: Detailed Guide for Painting Spindles, Risers and Stair Walls - Pursue Today
Monday 31st of January 2022
[…] it. It will stick to glossy surfaces. I have had zero chipping and peeling, and I have used it to paint our oak trim, our doors, our windows and even to paint our kitchen […]